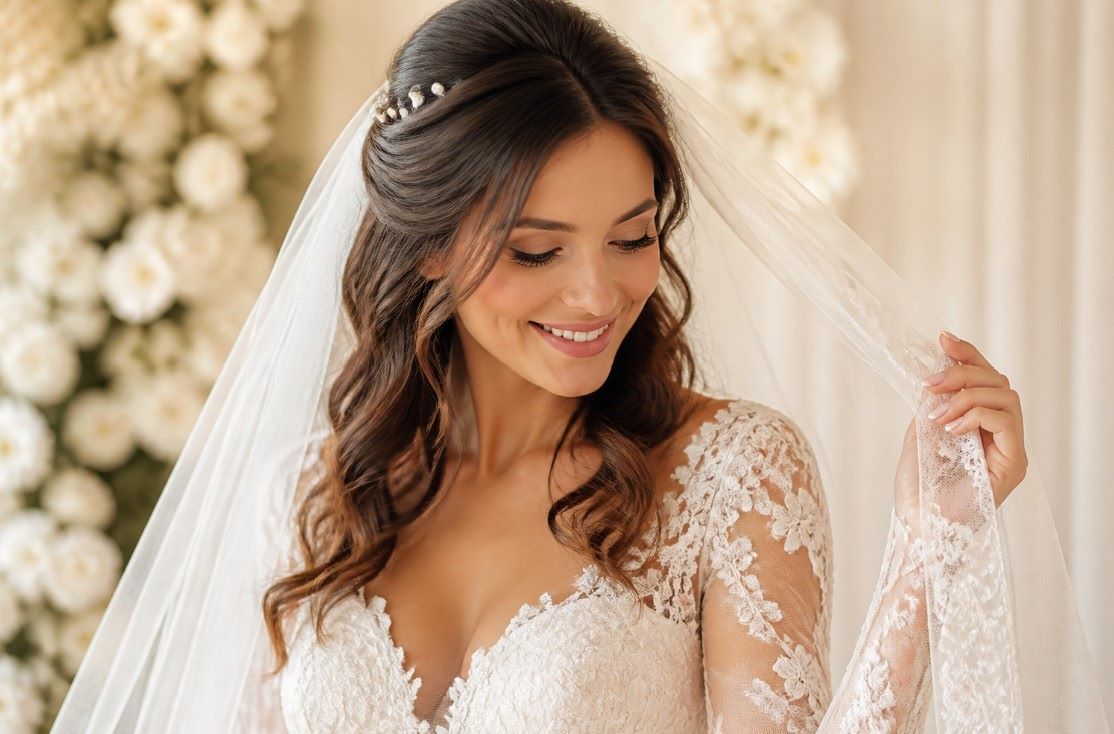
65 Wedding Hairstyles with Veils That Will Make You Feel Like a Princess
If you’re choosing your wedding hairstyle, I know how hard it can be to find a look that feels truly special with your veil. I love the idea of having soft curls, a polished bun, a braided crown, or a romantic ponytail that gives that beautiful princess feeling without spending a fortune. I also like to think about the veil placement, hair length, dress neckline, and overall wedding style before picking a hairstyle.
The best part is that I don’t think you have to spend a lot to create a gorgeous bridal look. With a few simple tools, affordable hairpins, and some practice, I can recreate many of these styles at home or show them to my hairstylist as inspiration.
Whether I’m going for something classic, modern, relaxed, or dreamy, these wedding hairstyles with veils give me plenty of ideas to find a look that feels beautiful and comfortable for my big day.
Soft Half-Up Curls With a Cathedral Veil
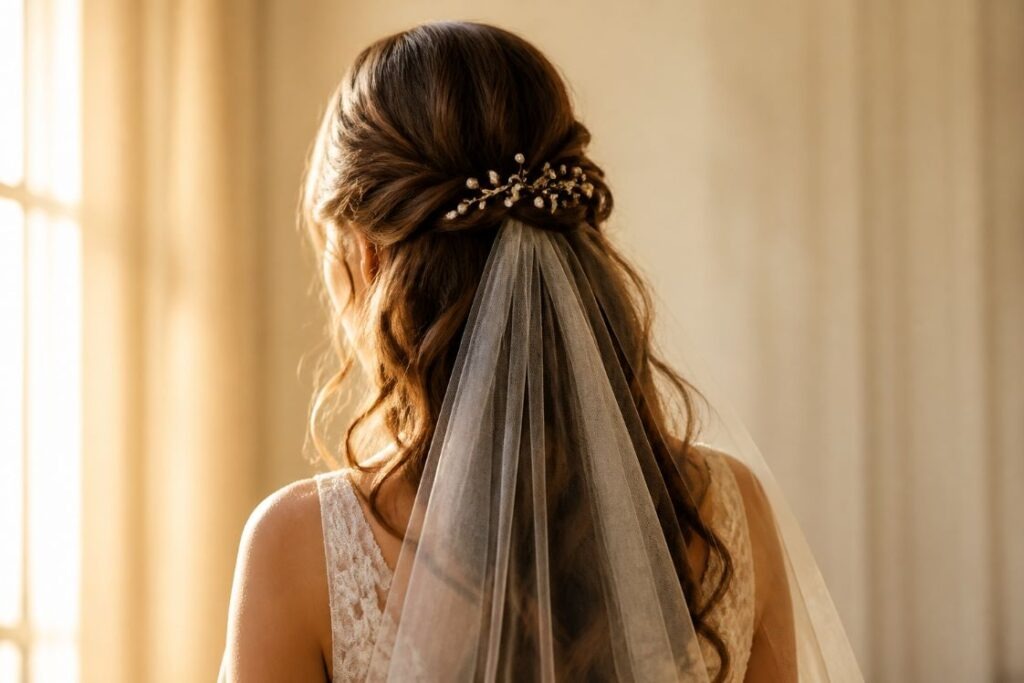
Soft half-up curls are a lovely choice when you want your hair down while still having a polished bridal shape. Curl the lower sections with a medium barrel iron, then gently loosen them with your fingers. Pull the front sections toward the back and secure them with small pins. Place the cathedral veil just above the pinned section.
For a softer finish, leave two thin curls near the cheeks. They add movement without making the hairstyle feel overdone. A few pearl pins can also give the style a bridal touch.
You do not have to buy expensive accessories. Small pearl hairpins from a craft store can work beautifully. Practice the hairstyle a few times before the wedding so you can decide how much volume feels comfortable.
If your hair is naturally straight, use a light styling spray before curling. For extra hold, pin the half-up section securely beneath the veil comb. This style works well with strapless gowns, sweetheart necklines, and flowing wedding dresses.
Low Chignon With a Fingertip Veil
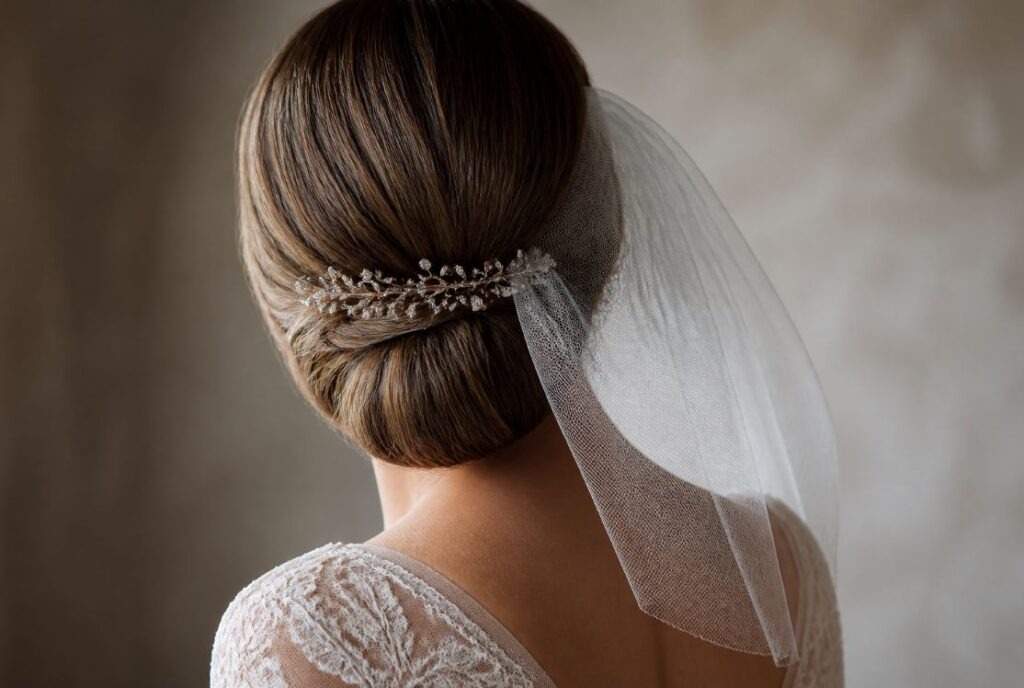
A low chignon creates a graceful shape at the back of the head. It also gives a veil a clean place to sit. Start by creating a low ponytail at the nape. Twist the hair into a compact bun and secure it with several bobby pins.
A fingertip veil works especially well because it adds softness without covering the entire hairstyle. You can place the veil above the bun for a traditional appearance or tuck it underneath for a cleaner finish.
For a budget-friendly accessory, try adding one vintage brooch from a thrift store. Remove the pin mechanism if necessary and attach the decorative piece with discreet hairpins.
Keep a few small strands loose around the face if you prefer a relaxed appearance. Smooth the crown gently with a soft brush. Avoid using too much product because it can make the hair look stiff in photographs.
This hairstyle pairs nicely with lace dresses, pearl earrings, and simple bridal jewelry. It also stays relatively compact, making it practical for dancing and outdoor ceremonies.
Romantic Side-Swept Waves With a Long Veil
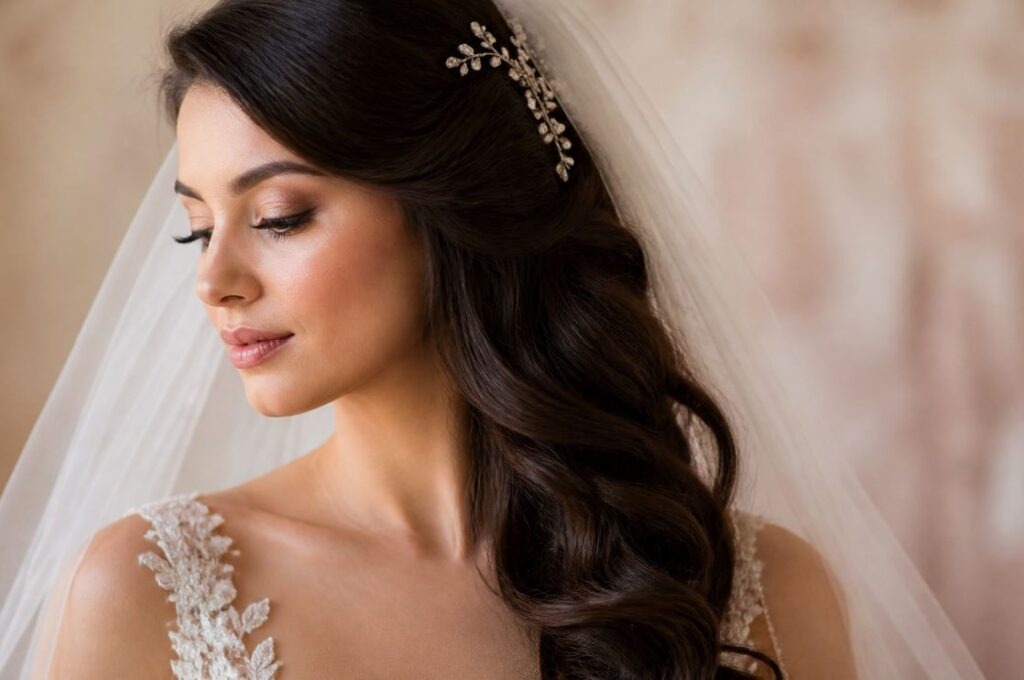
Side-swept waves create a romantic silhouette while keeping most of the hair visible from the front. Begin by curling the hair in sections. Let the curls cool before gently brushing them into smooth waves.
Sweep the hair toward one shoulder and secure the back with hidden pins. A long veil can attach near the crown without hiding the waves completely.
For an affordable finishing detail, add two or three small crystal pins near the side part. You can find inexpensive sets online or at accessory shops.
This hairstyle works best when the veil is lightweight. A very heavy veil can pull against the pinned section and make the style uncomfortable.
If you are doing your own hair, practice the side placement before the wedding. Take photographs from the front and side to check how the waves look.
A deep side part can make the style feel more dramatic. A middle part creates a softer appearance. Pair this look with drop earrings and a simple necklace so the hair remains the main feature.
Braided Crown With a Fingertip Veil
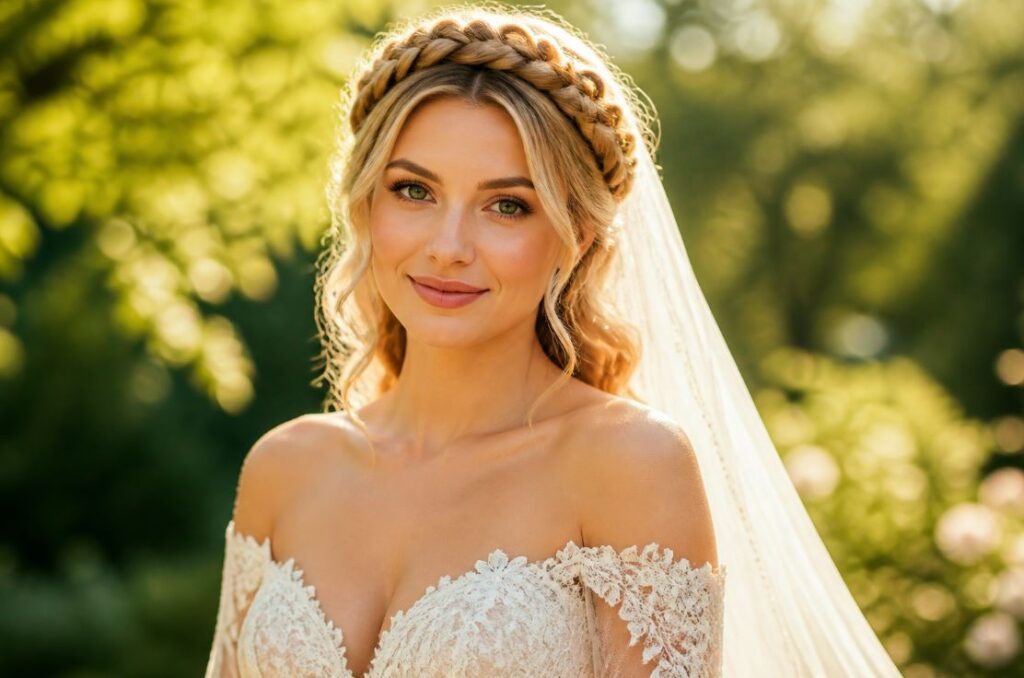
A braided crown gives your bridal hairstyle a romantic, storybook feeling. It works especially well with medium and long hair. Divide the front sections and create two simple braids. Bring them toward the back and pin them together.
Leave the remaining hair softly wavy. The veil can sit directly behind the braid, giving the hairstyle a layered appearance.
You can make the braid yourself if you practice beforehand. A basic three-strand braid is enough. It does not have to look perfectly uniform. Slightly relaxed braids can feel more natural.
Small flowers or pearl pins can be tucked into the braid. Faux baby’s breath is another inexpensive option. Keep the accessories lightweight so they do not pull the braid downward.
This hairstyle pairs beautifully with outdoor ceremonies, garden weddings, and lace gowns. If your hair is shorter, use clip-in extensions to create extra length for the waves.
A fingertip veil keeps the braid visible while still giving you that classic bridal finish. Pin the veil securely at two points to prevent shifting during the ceremony.
Classic Hollywood Waves With a Blusher Veil
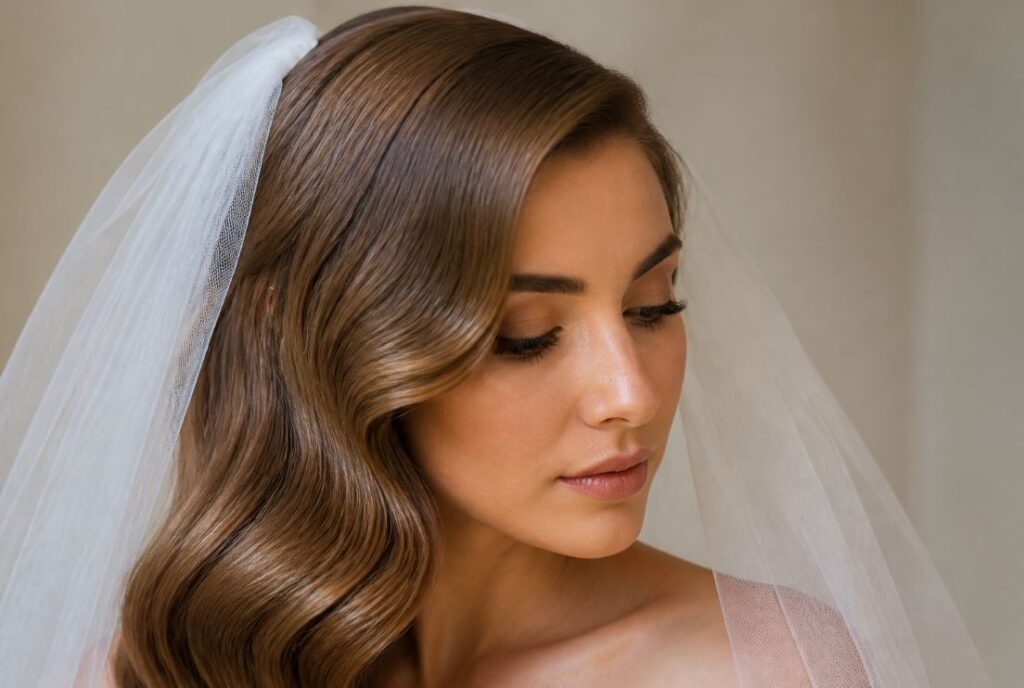
Hollywood waves bring a polished vintage feeling to bridal styling. Use a curling iron to create large, even curls. Allow them to cool completely before brushing them into smooth waves.
A blusher veil placed near the crown adds a traditional bridal detail. You can wear it over the face during the ceremony and move it back afterward.
For a less expensive approach, borrow a curling iron from a friend and purchase a simple veil separately. The hairstyle itself does not require elaborate accessories.
Use a small amount of styling spray to help the waves hold. Avoid brushing too aggressively because you want the wave pattern to remain visible.
This look pairs nicely with satin gowns, vintage earrings, and red or neutral bridal makeup. If your hair is naturally fine, use lightweight rollers before styling to create more body.
Take a few practice photographs under different lighting. Smooth waves can look different indoors and outdoors. This simple step helps you see whether the hairstyle has the shape you want for your wedding photos.
Messy Low Bun With a Long Sheer Veil
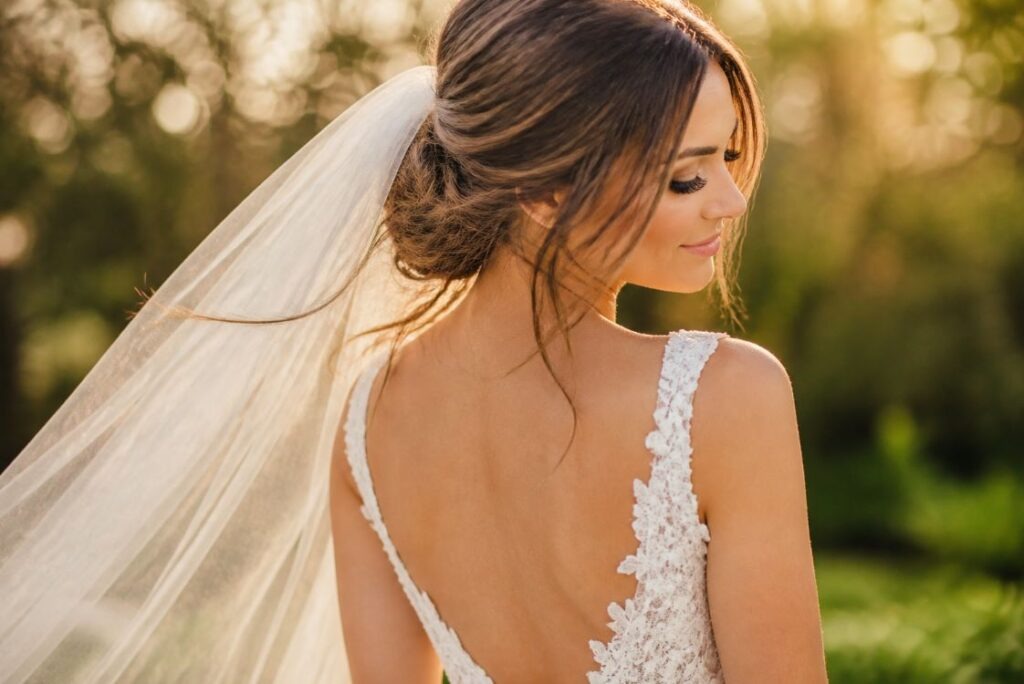
A messy low bun gives you a relaxed bridal style while still looking polished. Pull the hair into a low ponytail and twist it loosely into a bun. Secure it with bobby pins.
Do not worry about every strand being perfectly smooth. A few loose pieces can make the hairstyle feel soft and natural.
Attach a long veil above the bun. If you want the veil to frame the bun, place the comb slightly higher on the back of the head.
For a DIY accessory, add a small satin ribbon around the bun. Choose a shade close to your gown for a subtle effect.
This style works well for outdoor weddings because it has a naturally relaxed appearance. If the weather is humid, use a light anti-frizz product before pinning the bun.
Ask a friend to check the back of your hair before the ceremony. They can hide visible pins and make sure the veil comb sits securely.
A messy bun also works nicely with statement earrings because the neck and shoulders remain open.
High Bun With a Cathedral Veil
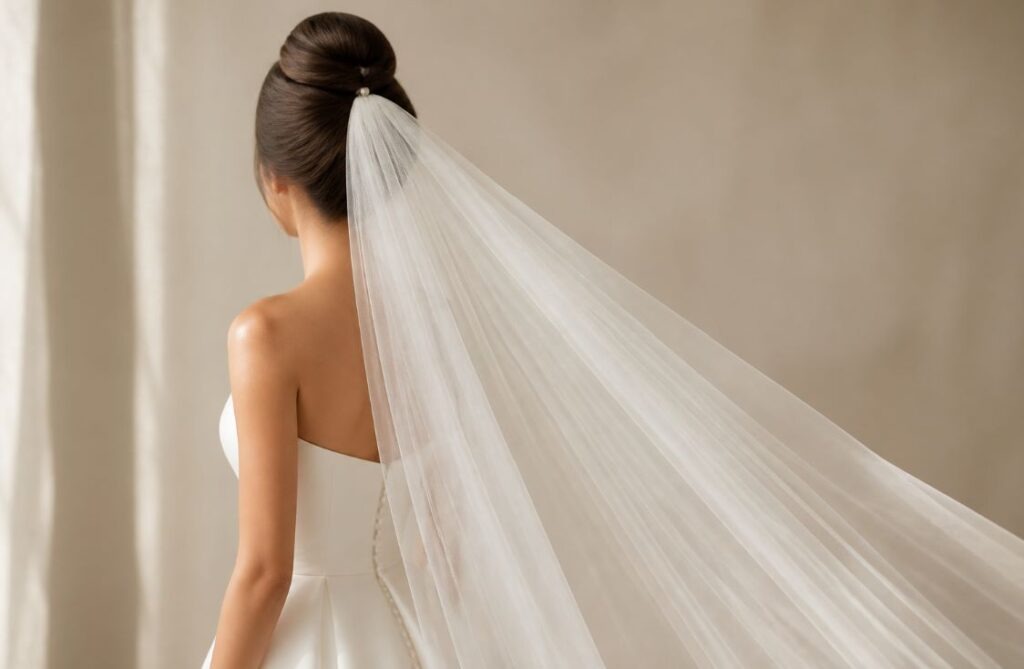
A high bun creates a graceful shape that pairs beautifully with a dramatic cathedral veil. Brush the hair into a high ponytail and twist it into a smooth bun. Secure it with strong bobby pins.
The veil can attach behind the bun or slightly underneath it. Try both placements before the wedding to see which one photographs better.
A high bun is also practical because it keeps hair away from the face. This can feel comfortable during a long ceremony or reception.
For a budget-friendly accessory, use a simple pearl comb instead of a large decorative piece. One small detail can be enough.
If your hair lacks length, a donut bun insert can create a fuller shape. These inserts are inexpensive and easy to use.
Smooth flyaways with a clean toothbrush and a tiny amount of hair product. This gives you more control without covering the hair in heavy spray.
Pair the style with chandelier earrings or a detailed neckline. The raised bun leaves plenty of room for those details.
Loose Boho Waves With a Chapel Veil
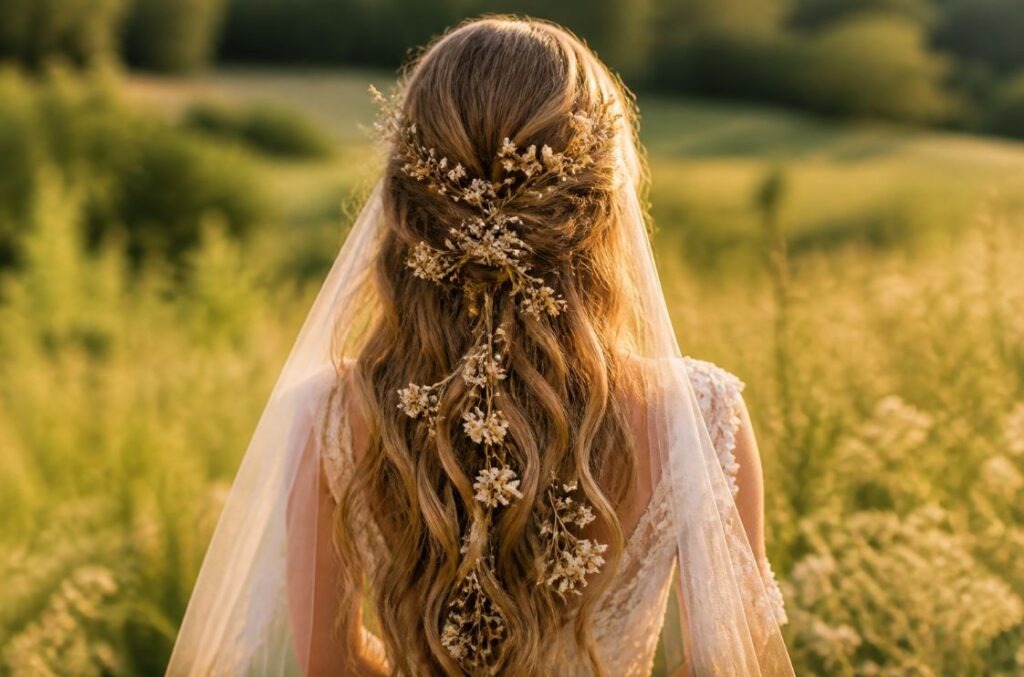
Loose waves are ideal for a relaxed bridal look. Curl random sections rather than making every curl identical. Then separate them gently with your fingers.
Add a few small dried flowers near one side of the head. Keep the pieces light so they stay secure.
A chapel veil gives the style a traditional bridal finish while keeping the overall appearance relaxed. Attach it behind the crown or below a small braid.
For a DIY option, purchase faux dried flowers and trim the stems short. Attach them to plain hairpins with craft glue.
This hairstyle works well for beach weddings, garden ceremonies, and rustic venues. It also looks lovely with flowy dresses and simple jewelry.
If your hair is naturally wavy, you may only need a few curls around the front. This can save styling time and reduce heat use.
Keep a small brush and extra pins in your emergency kit. A friend or bridesmaid can help tidy the waves after photos or dancing.
Sleek Ponytail With a Long Veil
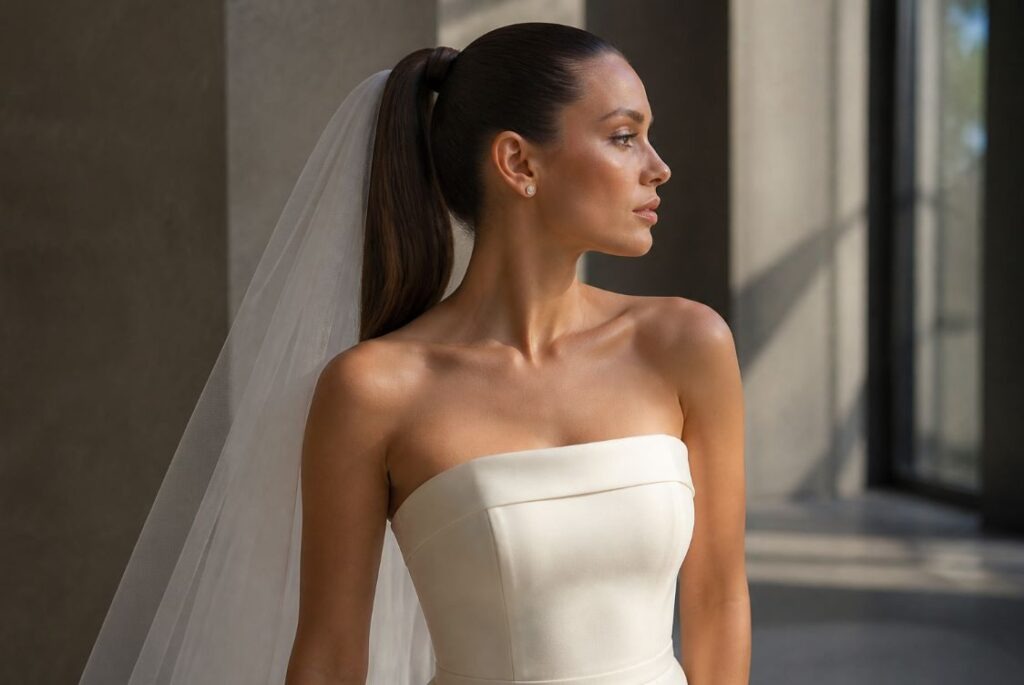
A sleek ponytail offers a clean and modern bridal appearance. Brush the hair carefully and secure it high or at the middle of the head.
Wrap a small section of hair around the elastic to hide it. Secure the end underneath with a bobby pin.
Attach a long veil close to the ponytail base. The veil will flow behind you while the ponytail remains visible.
For a simple DIY detail, use a satin ribbon around the base. Match it to the gown or choose a soft ivory shade.
A ponytail is practical for brides who want their hair away from their face. It also works well with modern gowns, square necklines, and simple accessories.
If your hair is fine, gently tease the crown before making the ponytail. This creates a little extra fullness.
Use a smoothing brush and light styling spray to control flyaways. Avoid pulling the hair too tightly if you plan to wear the hairstyle for several hours.
Pearl-Pinned Half-Up Hairstyle With a Fingertip Veil
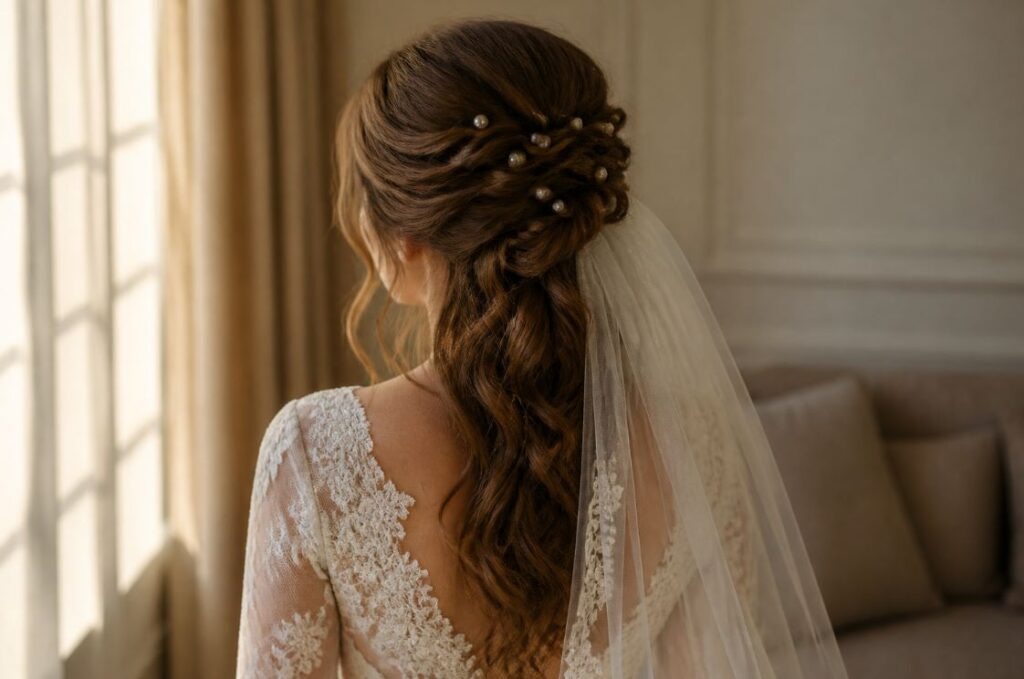
Pearl pins can make a simple half-up hairstyle feel bridal without requiring an elaborate hairpiece. Curl the lower sections and leave the curls loose.
Gather the top side sections toward the back. Pin them together and place small pearl pins around the gathered area.
The fingertip veil can sit just above the pearl details. This keeps both the veil and hairstyle visible.
You can create this look on a small budget by buying loose pearl hairpins in a multi-pack. Spread them throughout the hairstyle instead of using them all in one spot.
If your hair is thick, use stronger pins underneath the visible pearl pieces. The decorative pins can then sit on top.
This style works well with lace gowns and pearl jewelry. It also suits brides who want a romantic appearance without a large accessory.
Take a test photo from behind. This helps you see whether the pearls are evenly placed. Small adjustments can make the finished hairstyle look much more balanced.
Twisted Half-Up Style With a Cathedral Veil
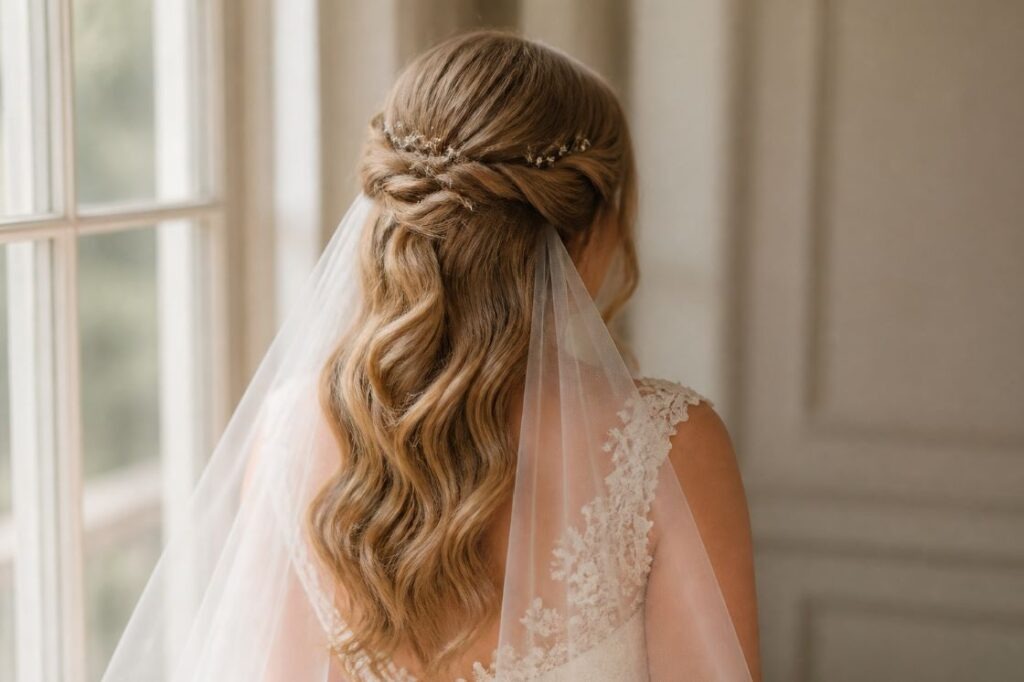
A twisted half-up style is simple enough for a DIY bridal trial. Take two front sections and twist them backward. Pin them together near the crown.
Curl the remaining hair into loose waves. A cathedral veil can attach just above the twisted section.
The twist gives the hairstyle shape without requiring advanced braiding skills. You can make the twist tighter for a polished appearance or loosen it for a softer effect.
For an inexpensive detail, add a tiny crystal comb where the twists meet. One accessory can be enough.
If your hair is slippery, lightly tease the area underneath the twist before inserting pins. This gives the pins something to grip.
This hairstyle works with many dress styles. It looks especially pretty with open backs and strapless gowns.
Practice with the veil attached. Some hairstyles look perfect alone but change once the veil is added. A short rehearsal lets you adjust the placement before the wedding day.
Romantic Fishtail Braid With a Long Veil
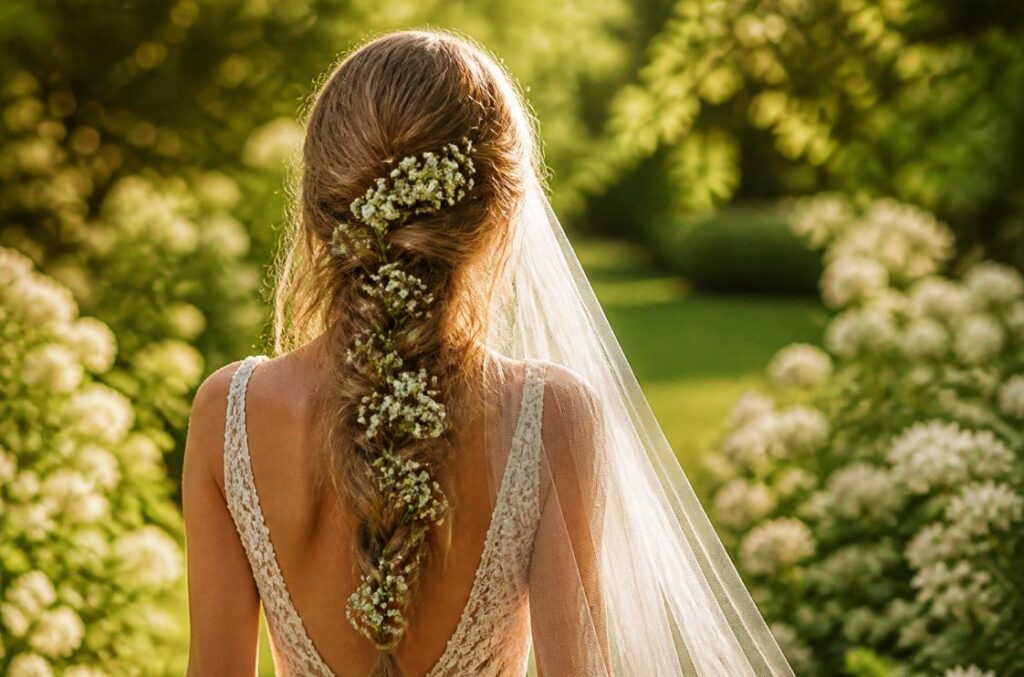
A fishtail braid creates plenty of visual detail while keeping the hair controlled. Start with a low ponytail and divide it into two sections.
Take a thin piece from the outside of one section and cross it over to the other side. Repeat until the braid reaches the desired length.
Loosen the edges gently to make the braid appear fuller. Add a few tiny flowers if you like.
A long veil can attach above the braid. Keep the comb secure with two or three hidden pins.
For a DIY version, practice the braid on a friend before attempting it on yourself. The technique becomes easier after a few tries.
This style works beautifully with outdoor weddings and relaxed gowns. It can also stay comfortable during dancing.
If your hair is shorter, use a clip-in braid or extensions for extra length. Choose a shade close to your natural hair for a seamless appearance.
Keep the braid slightly loose rather than pulling it tight. This creates a softer bridal shape.
Low Ponytail With a Blusher Veil
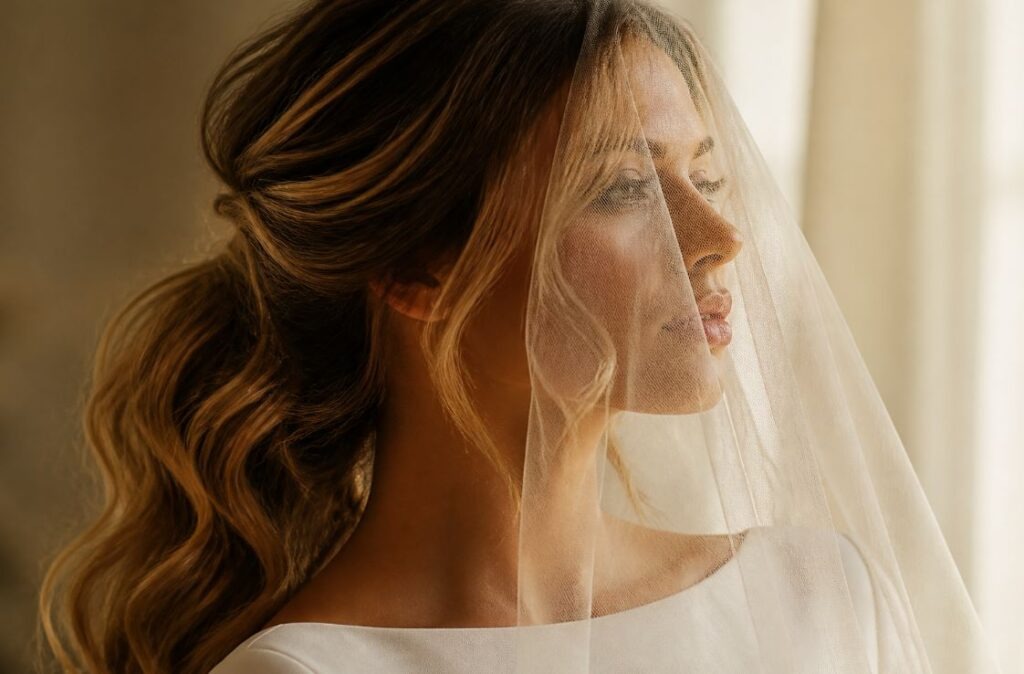
A low ponytail can look surprisingly elegant for a wedding. Curl the lengths and gather the hair at the nape.
Wrap a small section around the elastic. Pin it underneath so the band stays hidden.
A blusher veil adds a traditional touch and creates a beautiful moment during the ceremony. Place it near the crown so it falls naturally over the face.
For a budget-friendly finish, use a simple satin-covered elastic beneath the wrapped hair. It gives extra grip without being visible.
This hairstyle is comfortable for brides who dislike heavy updos. It also works well with low-backed dresses and delicate earrings.
If your hair is naturally straight, create loose waves before making the ponytail. If it is already wavy, simply define a few sections with a curling iron.
Keep several bobby pins in your bridal emergency kit. They can fix loose sections quickly after hugs, dancing, or outdoor photographs.
Textured Updo With a Chapel Veil
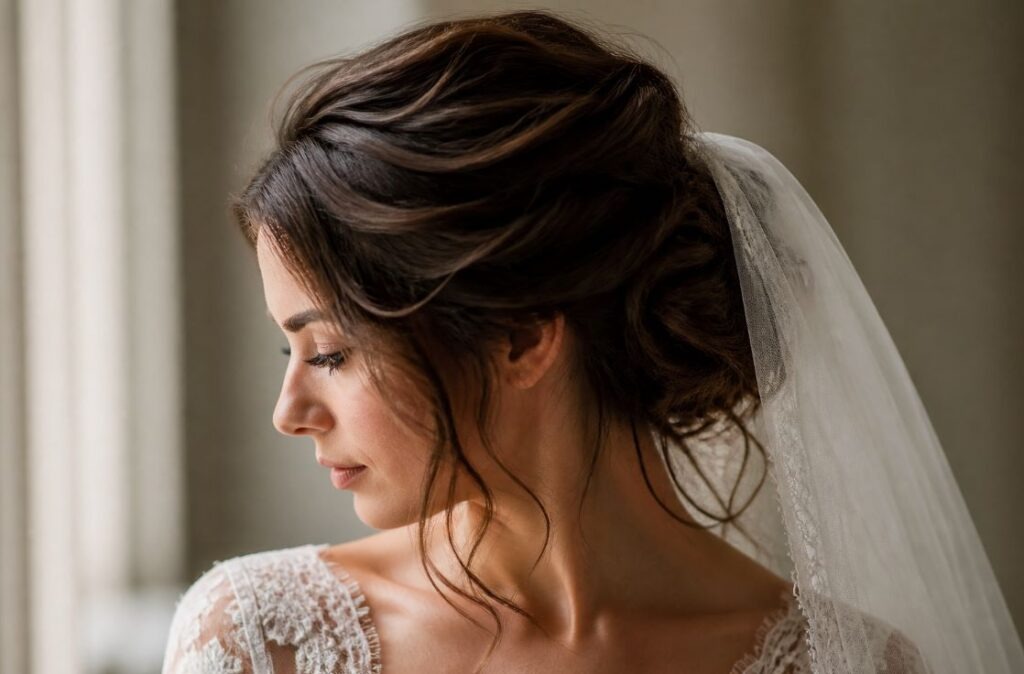
A textured updo combines soft volume with a secure shape. Start by curling the hair in loose sections.
Gather the back into a low or middle updo. Pin each section separately rather than twisting all the hair at once.
Leave a few small pieces around the face. They soften the overall shape.
A chapel veil works well because it adds length without completely covering the hairstyle. Attach it just above the updo.
You can create inexpensive texture with a simple curling iron and light styling spray. There is no need for a large collection of styling products.
For extra decoration, use a few small faux flowers or pearl pins. Place them close to the veil comb so the details stay connected.
This hairstyle suits lace dresses and romantic wedding themes. It can also work for brides with medium-length hair when carefully pinned.
Take photos from several angles during your trial. The back view matters just as much as the front because the veil and hairstyle meet there.
Sleek Middle-Part Bun With a Cathedral Veil
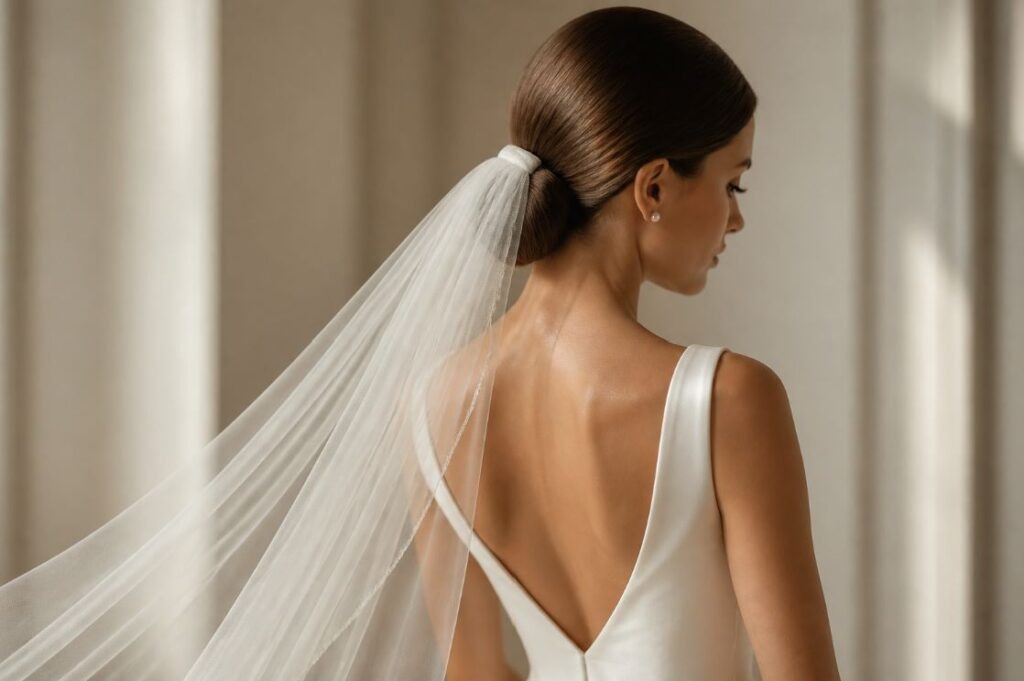
A middle-part bun gives a clean and polished bridal appearance. Create a straight center part and brush the hair smoothly toward the back.
Secure a low ponytail and twist it into a compact bun. Use several bobby pins to hold the shape.
Place the cathedral veil beneath the bun for a sleek silhouette. This placement also keeps the crown visible.
For a low-cost accessory, skip the hairpiece and let the veil provide the main detail. A simple hairstyle can look beautiful with a dramatic veil.
If you have flyaways, smooth them with a tiny amount of styling cream. A clean toothbrush can help guide small strands into place.
This hairstyle pairs nicely with structured gowns and statement earrings. It also works well for brides who prefer a neat appearance throughout the day.
Practice the center part several times before the wedding. Small differences in the part can change the overall shape of the face.
Curly Updo With Pearl Veil Comb
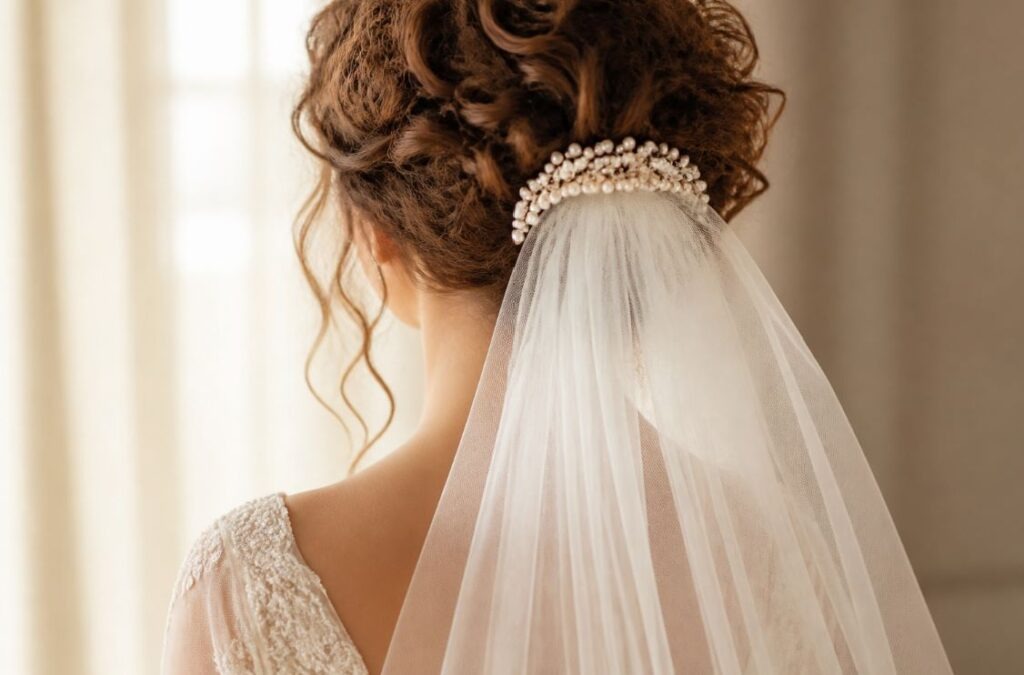
A curly updo can create a soft and feminine bridal silhouette. Curl the hair first so each section has natural movement.
Gather the curls toward the back and pin them loosely. Avoid flattening every curl because the texture is part of the hairstyle.
Add a pearl veil comb at the back. The comb can hold the veil while also serving as the main accessory.
For a cheaper alternative, buy a plain veil and attach a small pearl comb yourself. Use strong thread or secure attachment points according to the veil fabric.
Leave a few curls near the temples. They frame the face and soften the updo.
This hairstyle works well with sweetheart necklines, lace gowns, and pearl earrings. It also photographs beautifully from the back.
If you are styling your own hair, practice the pinning pattern before the wedding. You can take a photo after each attempt and compare the shape.
Keep the curls slightly loose. A relaxed finish often looks more natural in close-up bridal photographs.
Waterfall Braid With a Fingertip Veil
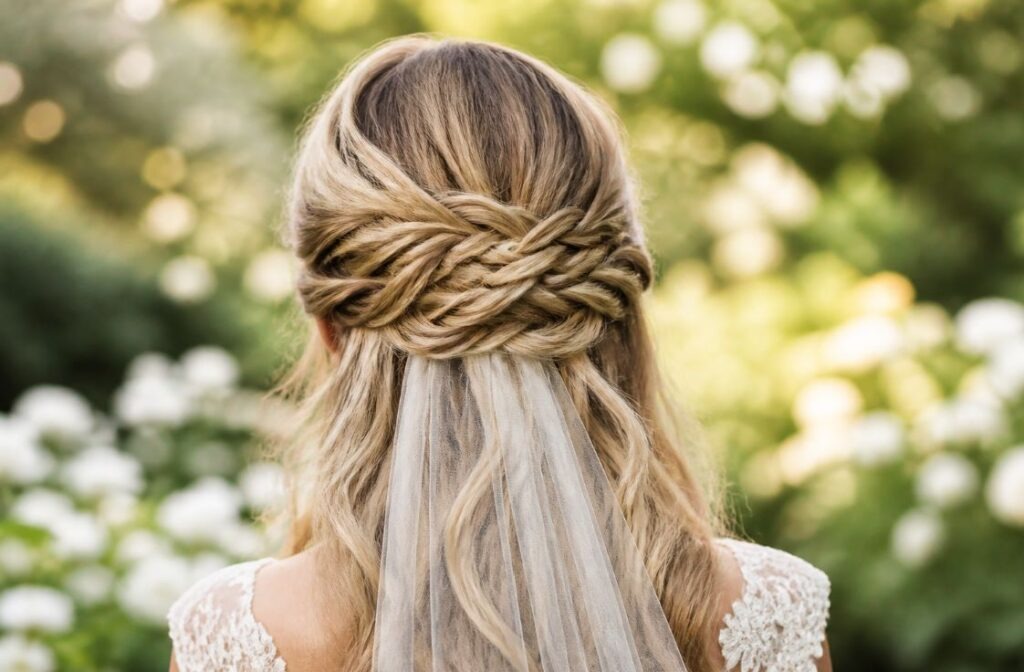
A waterfall braid creates a pretty horizontal detail across the back of the head. It works especially well with loose waves.
Start near one temple and create a simple braid while allowing selected strands to fall through the braid. Continue toward the opposite side.
Secure the end with a discreet pin. Add a few tiny pearl pins if desired.
A fingertip veil can attach below the braid so the decorative pattern remains visible.
This hairstyle can be done at home with practice. Watch a basic waterfall braid tutorial and practice slowly before your bridal trial.
If the braid feels difficult, ask a friend or bridesmaid to help. The finished style does not require professional-level perfection.
Use small clear elastics beneath the braid where necessary. Cover them with loose hair or decorative pins.
This look works well with garden weddings and flowing dresses. It gives the back of the hairstyle plenty of detail while keeping the overall appearance soft.
Romantic Bun With Tiny Baby’s Breath
Baby’s breath can add delicate detail to a simple bun. Start with loose waves and gather the hair at the back.
Twist the hair into a low bun and secure it with hidden pins. Leave a few pieces loose around the face.
Place tiny sprigs of baby’s breath around one side of the bun. Keep the pieces small so the hairstyle remains comfortable.
A cathedral veil can attach above the flowers. If you want the flowers visible during the reception, move the veil backward after the ceremony.
For a budget-friendly option, use faux baby’s breath from a craft shop. Cut small pieces and attach them to plain hairpins.
This hairstyle works beautifully with outdoor ceremonies and simple gowns. It also pairs well with minimal jewelry.
Avoid adding too many flowers. A few small sprigs can create enough detail without covering the bun.
Test the flower placement before your wedding day. Walk around with the pieces secured to check whether they stay comfortable.
Voluminous Blowout With a Long Veil
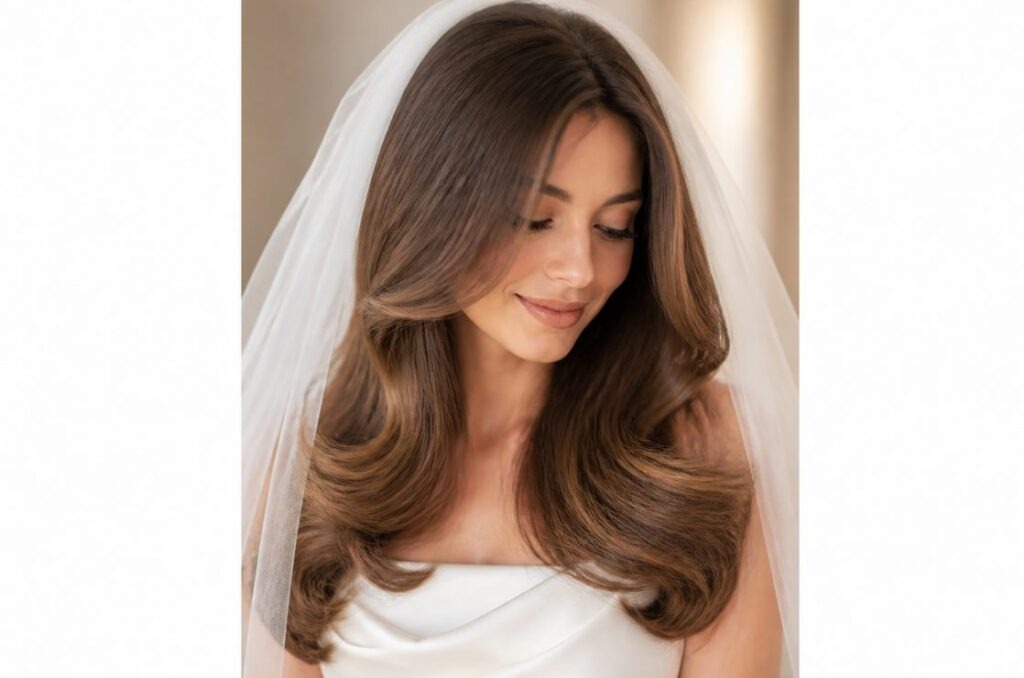
A voluminous blowout gives a glamorous appearance while keeping the hair down. Use a round brush and blow-dryer to shape the roots and ends.
Curl a few sections afterward if you want more movement. Brush through the curls for a soft finish.
Attach the long veil near the crown. The veil will flow behind the hair while leaving the front fully visible.
For a DIY approach, ask a friend to help with the back sections. This can make the blowout easier if you are styling your own hair.
Use a heat protectant before styling. Keep the amount light so the hair does not feel coated.
A simple pearl clip can sit beside the veil comb. You can find affordable options at bridal accessory stores.
This hairstyle suits classic gowns, modern dresses, and simple necklines. It also works well for brides who want their hair to remain recognizable rather than placing it into an updo.
Take a few trial photos from behind. This helps you check whether the veil is sitting correctly over the volume.
Braided Low Bun With a Chapel Veil
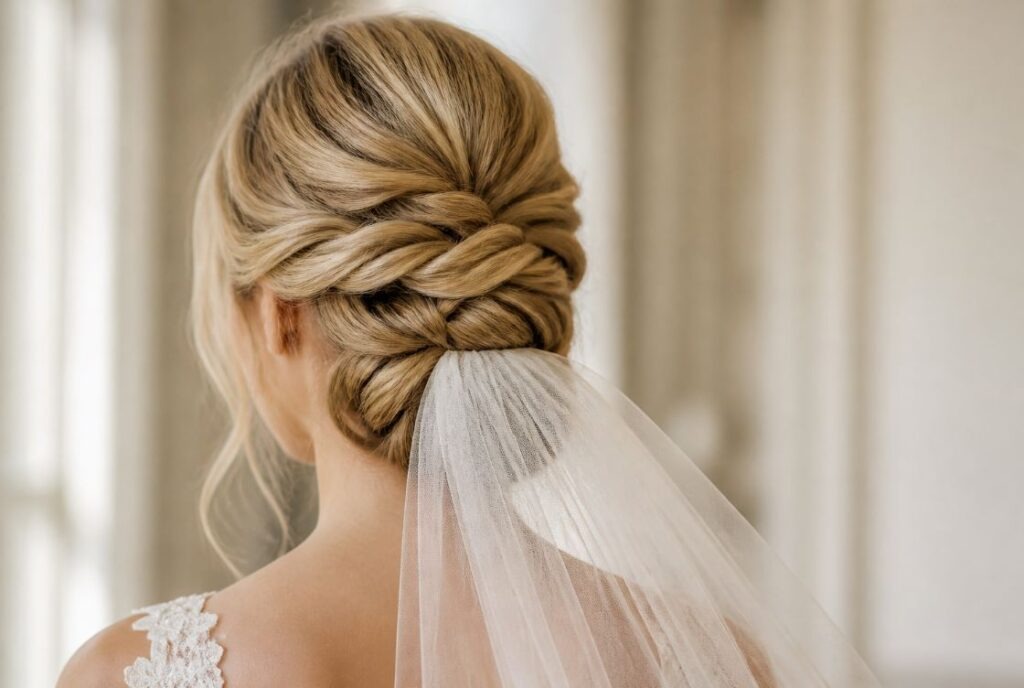
A braided low bun adds texture without requiring a large accessory. Start by creating a low ponytail.
Divide the ponytail into two or three sections. Braid each section and wrap the braids around the base.
Pin everything securely. A chapel veil can attach just above the finished bun.
For a budget-friendly detail, add one small pearl pin where the braids meet. One decorative piece can be enough.
Keep the front simple with a middle or soft side part. A few loose strands can make the hairstyle feel less formal.
This style works especially well with lace gowns and vintage-inspired dresses. It also stays relatively secure during movement.
If your hair is short, create a small braided bun using a hairpiece that matches your color. These pieces can be reused for other events.
Practice the bun while wearing your veil. This lets you see whether the veil comb pulls against the braid.
Soft Curly Ponytail With a Cathedral Veil
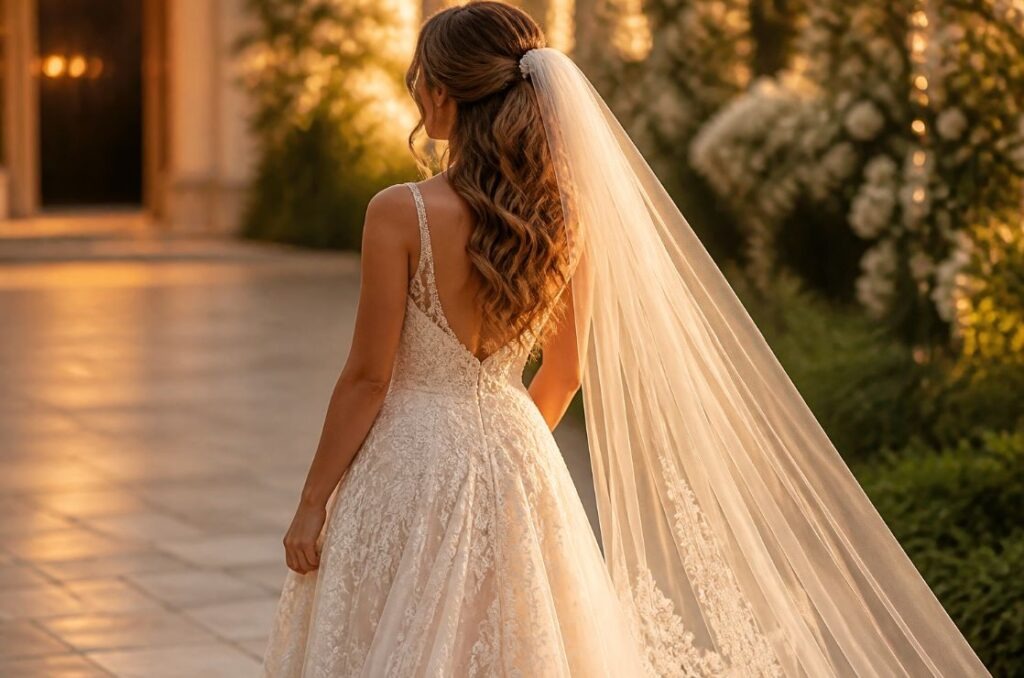
A curly ponytail combines comfort with a romantic bridal shape. Curl the hair in medium sections and allow the curls to cool.
Gather the hair at the middle or lower back of the head. Secure it with a strong elastic.
Wrap a small curl around the elastic to hide it. Pin the end underneath.
Attach the cathedral veil near the crown. The veil can flow over the ponytail or behind it.
For an inexpensive finish, add a satin ribbon around the ponytail base. Choose ivory, champagne, or a shade close to your dress.
This hairstyle works well for brides who plan to dance a lot. The hair stays controlled while the curls create movement.
If your hair is fine, tease the ponytail lightly near the base. Avoid heavy teasing because you still want the curls to look soft.
Keep extra pins and a spare elastic with your bridal emergency supplies. These small items can help repair the ponytail quickly during the reception.
Vintage Roll Updo With a Birdcage Veil

A rolled updo can give your wedding hairstyle a classic vintage appearance. Brush the hair smoothly and create a deep side part.
Roll sections toward the back and secure them with hidden pins. Keep the shape compact and polished.
A birdcage veil adds a dramatic vintage detail. Position it slightly to one side so it frames the eyes and cheekbone.
You can create a simple version at home with a basic rolled hairstyle and a ready-made birdcage veil.
For accessories, choose small pearl earrings or one vintage-inspired clip. Avoid adding too many pieces because the veil already attracts attention.
This style pairs well with tea-length dresses, satin gowns, and retro wedding themes.
If your hair is shorter, a small amount of styling cream can help create the roll. Hair padding can also add shape without requiring long hair.
Practice the veil placement with your dress neckline in mind. A small adjustment can make the entire bridal silhouette look more balanced.
Side Braid With Loose Waves and a Chapel Veil
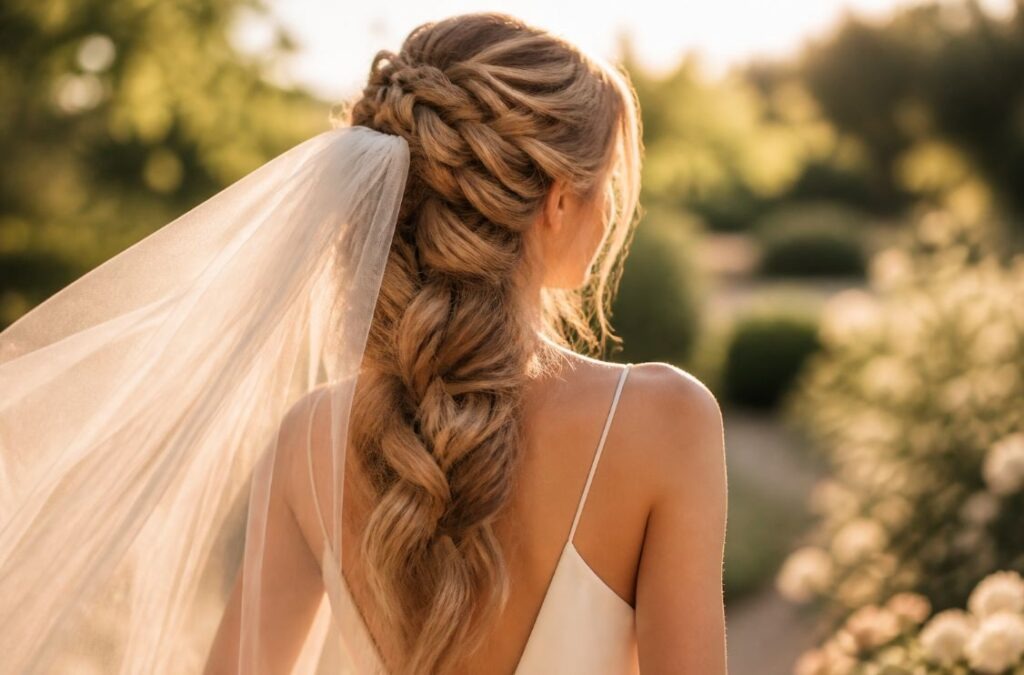
A side braid gives loose waves a little extra structure. Start with a deep side part and bring the front section toward one shoulder.
Create a loose three-strand braid. Stop around the middle of the hair and secure it discreetly.
Curl the remaining hair into relaxed waves. Let the braid and waves fall over the same shoulder.
A chapel veil can attach at the crown behind the braid. This placement keeps the braid visible.
For a DIY touch, weave a narrow ivory ribbon through the braid. Satin ribbon is inexpensive and easy to remove later.
This style works well for rustic, garden, and outdoor weddings. It also pairs nicely with flowing gowns.
Keep the braid loose rather than tight. Gently pull the edges after securing it to create a fuller appearance.
If your hair slips easily, add small clear elastics underneath the braid. Hide them beneath nearby curls.
Take a side photo during your trial. The hairstyle should look balanced from both the front and side.
Half-Up Twists With a Blusher and Cathedral Veil
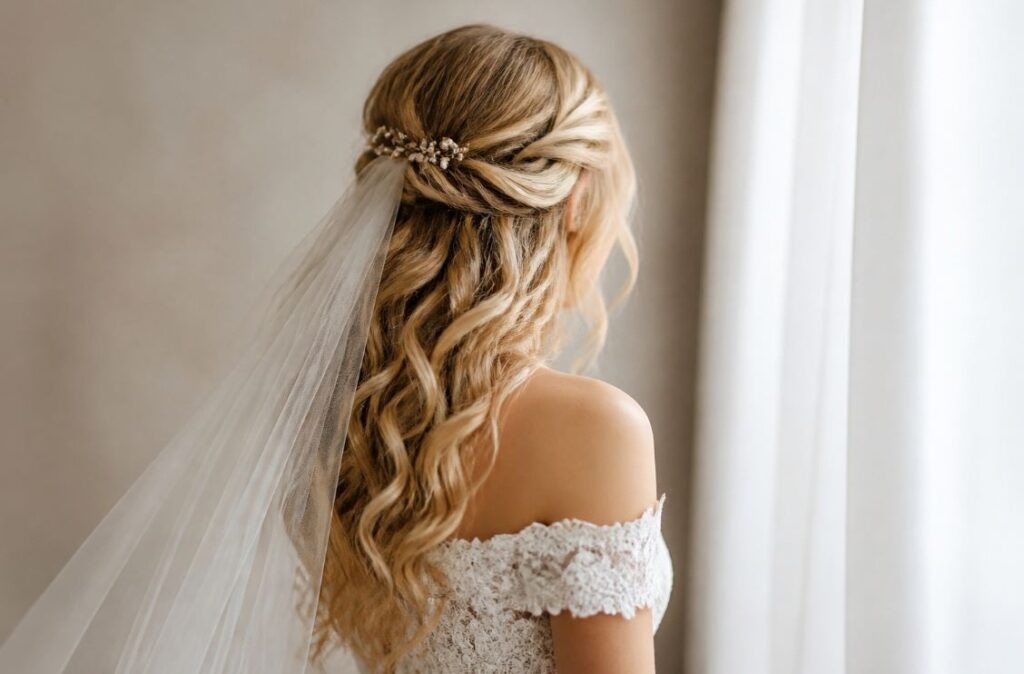
Layering a blusher with a cathedral veil creates a traditional bridal appearance. Keep the hairstyle soft so the veil remains the main detail.
Create two simple twists from the front sections and pin them behind the crown. Curl the remaining hair into loose waves.
Place the blusher over the face and attach the longer veil behind it.
For a budget-friendly approach, look for a two-piece veil set rather than purchasing separate pieces. Simple tulle can also work for a homemade blusher.
Add a few pearl pins where the twists meet. They can help hide the attachment point.
This hairstyle suits classic gowns, sweetheart necklines, and formal ceremonies.
If you are making the blusher yourself, use lightweight tulle and a small comb. Keep the fabric soft enough to move comfortably.
Practice lifting the blusher before the ceremony. You can ask your maid of honor to help if the comb is difficult to reach.
The half-up twists keep the hair romantic while giving the layered veil a secure place to sit.
Glamorous Hollywood Curls With a Cathedral Veil
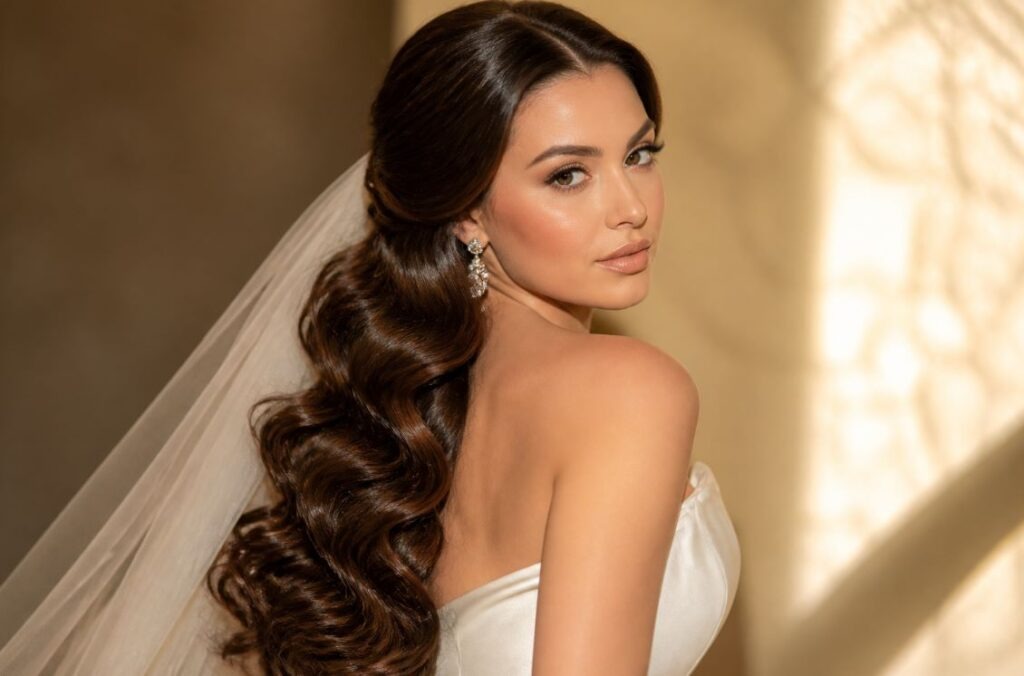
Large Hollywood curls create a dramatic princess-inspired appearance. Divide the hair into sections and curl each piece in the same direction.
Let the curls cool completely before brushing them gently. This helps create smooth waves instead of separate ringlets.
Place the cathedral veil at the crown so it flows behind the curls.
A simple crystal hairpin can add sparkle near the veil attachment. You do not need a large headpiece.
For a DIY approach, use hot rollers if you already own them. They can make it easier to create consistent curls.
This hairstyle works well with satin gowns and dramatic earrings. It also looks beautiful in evening wedding photographs.
If your hair is fine, use lightweight rollers for extra shape. Avoid heavy products that can flatten the curls.
Ask your stylist or friend to check the veil attachment from behind. The comb should sit securely without crushing the waves.
Keep a few spare pins in your bag. They can help repair the style if the veil pulls on the curls during the celebration.
Romantic French Braid With a Fingertip Veil
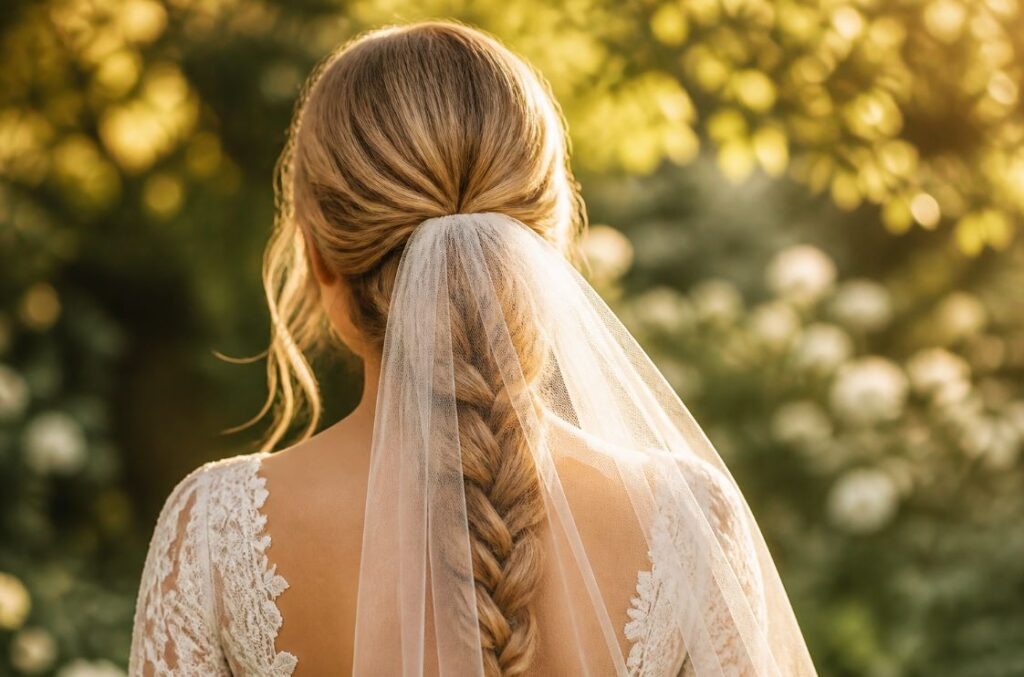
A French braid can create a classic bridal hairstyle with a relaxed finish. Start near the crown and gradually add sections as you braid downward.
Keep the braid slightly loose. Pull a few outer sections gently after securing it.
Attach the fingertip veil above the braid. This keeps the hairstyle visible while adding a traditional bridal detail.
For a simple DIY accessory, tuck tiny faux flowers into the braid. Use lightweight pieces so the braid stays comfortable.
This hairstyle works well for outdoor ceremonies and rustic venues. It can also help keep longer hair controlled throughout the day.
If you cannot French braid your own hair, ask a friend to practice with you. Once they learn the pattern, the style can be recreated without professional equipment.
Use small clear elastics at the braid ends. Hide them with nearby hair or ribbon.
The finished look can be soft and romantic without requiring expensive styling products or elaborate accessories.
Textured Ponytail With a Long Lace Veil
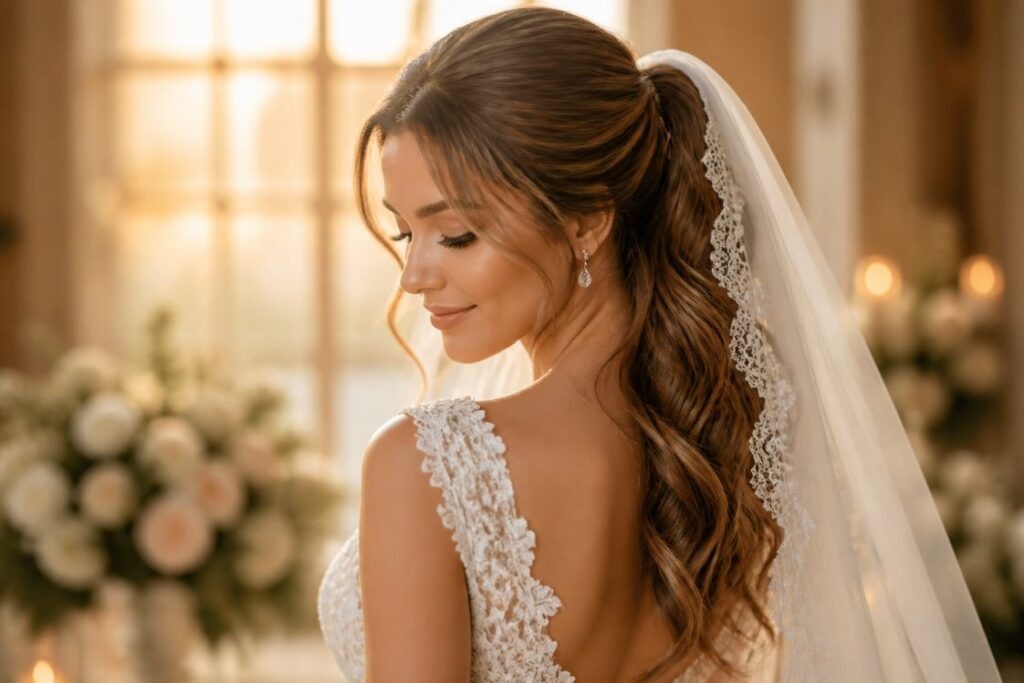
A textured ponytail gives you movement while keeping the hair away from the face. Curl the hair first, then gather it loosely at the back.
Leave a few strands around the face. These pieces create softness around the hairline.
Attach a long lace-trimmed veil near the ponytail base. The lace edge can echo details in the gown.
For a budget-friendly idea, choose a plain veil and add a narrow lace trim yourself. Sew or carefully attach the trim along the edge.
This style works nicely with boho gowns, lace dresses, and outdoor celebrations.
If your ponytail feels too flat, tease the crown gently before securing it. A small amount of volume can change the overall shape.
Use a decorative elastic or ribbon around the base. Keep the accessory simple so it does not compete with the veil.
This hairstyle is also easy to refresh during the reception. A few curls can be reshaped with a curling iron if needed.
Romantic Braided Crown With a Cathedral Veil
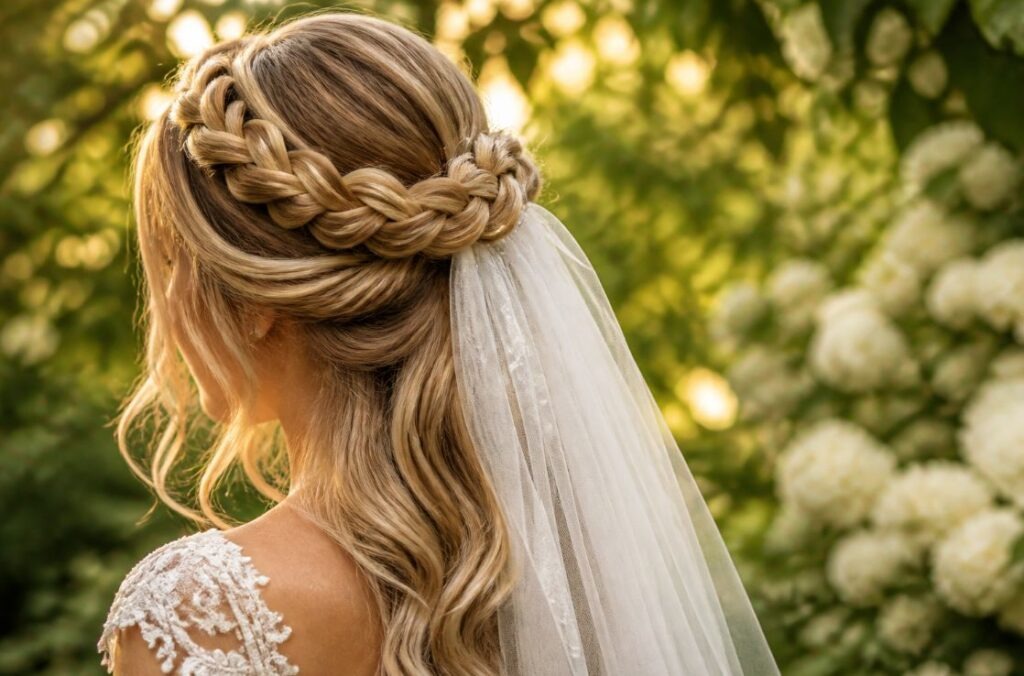
A full braided crown gives a romantic princess-inspired shape. Divide the hair into sections and create two braids.
Wrap each braid around the top of the head and pin them carefully. Leave the lower hair loose in waves.
Attach the cathedral veil behind the crown. This placement keeps the braid visible while giving the veil plenty of movement.
For a DIY version, use a basic three-strand braid. The hairstyle can still look beautiful when the braid is slightly relaxed.
Add tiny pearl pins along one side if you want extra detail. Avoid placing them everywhere.
This style pairs well with garden weddings, lace gowns, and floral accessories.
If your hair is medium length, use discreet extensions to make the braids longer. Choose a shade close to your own hair.
Practice wearing the hairstyle for a few hours during your trial to see how comfortable it feels.
Sleek Low Ponytail With a Fingertip Veil
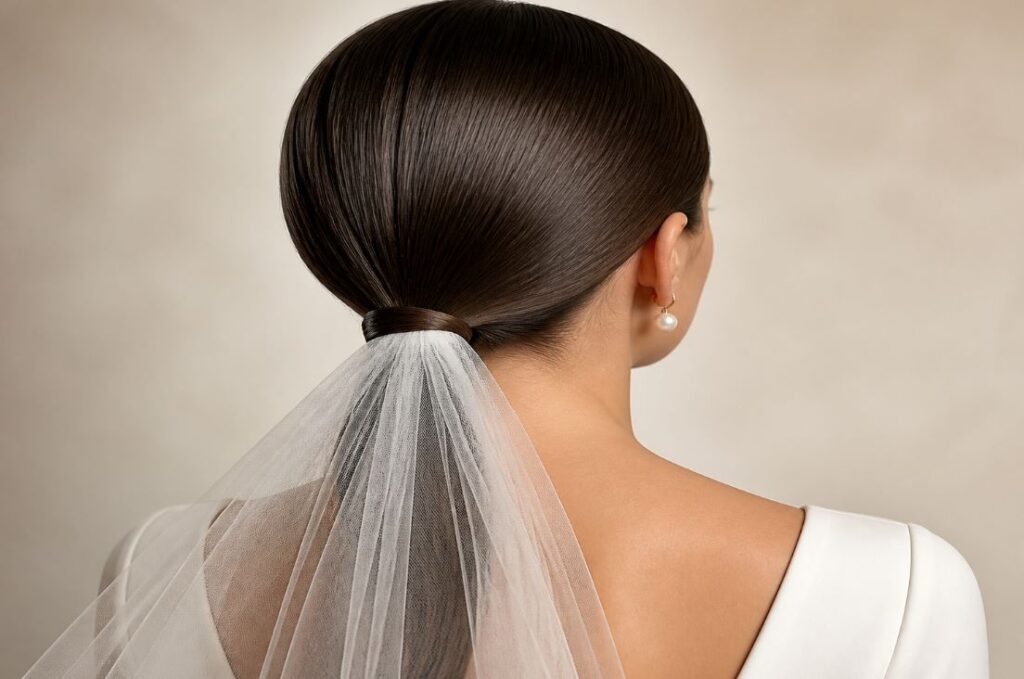
A sleek low ponytail offers a simple and polished bridal option. Create a center part and brush the hair toward the nape.
Secure it with a strong elastic. Wrap a small piece of hair around the base to hide the band.
Attach the fingertip veil just above the ponytail. This creates a clean line from the hairstyle into the veil.
For an inexpensive finish, use a plain pearl hairpin near the veil attachment. One small accessory can provide enough detail.
This hairstyle works well with modern gowns and simple jewelry. It is also comfortable for brides who want minimal hair around the face.
Use a small amount of smoothing cream to control flyaways. A soft brush can help create an even finish.
If your hair is naturally curly, you can straighten it first or keep the natural texture and create a lower textured ponytail.
Practice sitting, standing, and moving while wearing the veil. The hairstyle should stay comfortable during the full wedding day.
Loose Updo With a Lace-Edged Veil

A loose updo can create a soft appearance without looking overly formal. Curl the hair first, then gather sections loosely toward the back.
Pin each section individually. Leave several small curls around the face and neckline.
A lace-edged veil can attach near the back of the crown. If your gown has lace details, the veil edge can echo them.
For a budget-friendly option, use a plain veil and add a narrow lace trim. Choose a pattern that resembles the gown.
This hairstyle works with romantic, vintage, and garden wedding styles. It also gives statement earrings room to stand out.
Avoid pulling the hair too tightly. A relaxed shape is the main feature of this look.
If you are doing the hairstyle yourself, work in small sections. Pinning gradually makes it easier to create a balanced shape.
Take a back photo before adding the veil and another afterward. This helps you check whether the veil is hiding too much of the hairstyle.
Soft Beach Waves With a Cathedral Veil
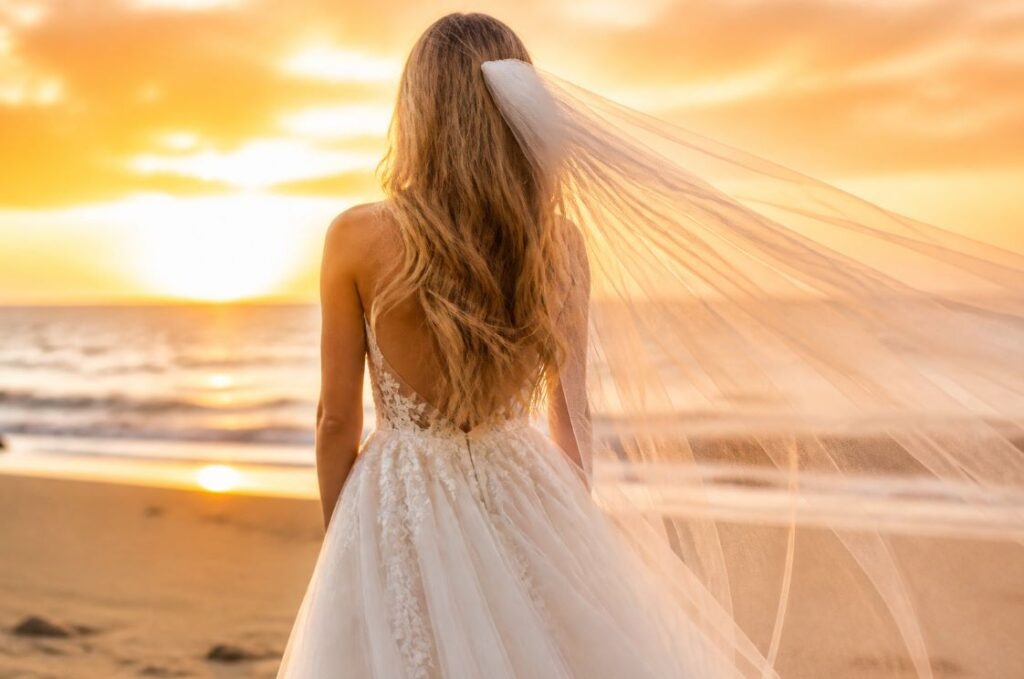
Soft beach waves create an effortless bridal appearance. Use a curling iron to create loose bends rather than tight curls.
Alternate the curl direction so the hair looks natural. Once the hair cools, separate the waves gently with your fingers.
Attach a cathedral veil near the crown. Outdoor wind can make the veil move beautifully behind you.
For a low-cost accessory, skip extra pins and let the veil provide the main decorative element.
This hairstyle suits beach ceremonies, destination weddings, and simple flowing gowns.
Use a light styling product to help the waves hold. Avoid heavy products that can make the hair feel stiff.
If you have naturally wavy hair, enhance only the sections that look uneven. This saves time and keeps the natural texture visible.
Bring extra bobby pins to the ceremony. Wind can loosen small sections even when the main hairstyle remains secure.
Choose a veil comb with strong teeth for outdoor weddings. A secure attachment can make the style much easier to manage.
Princess-Inspired Half-Up Hairstyle With Crystal Veil
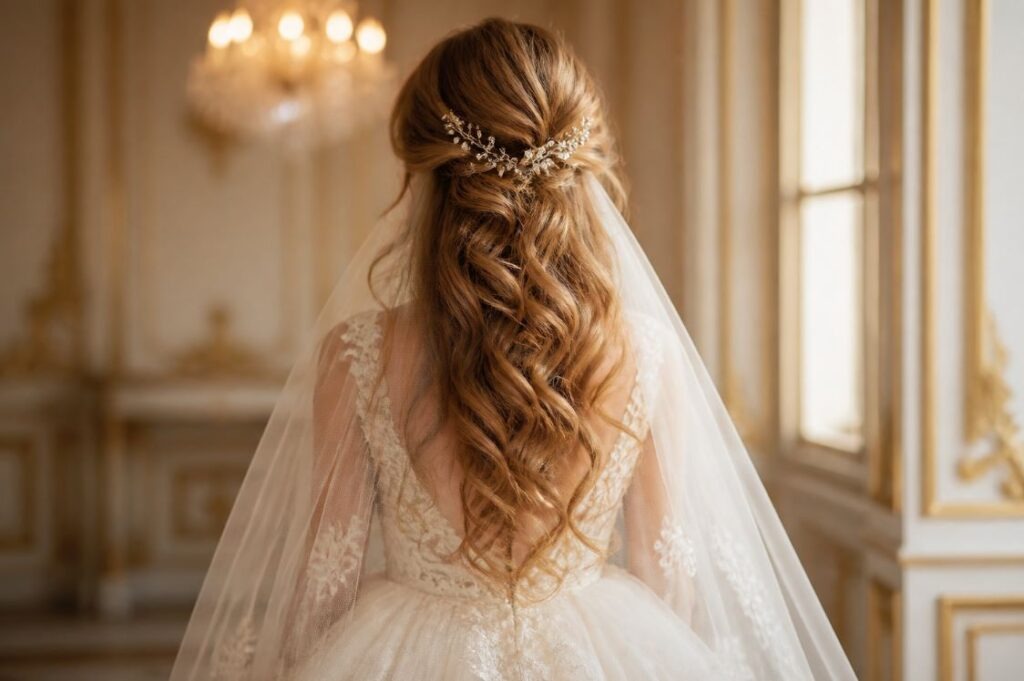
A voluminous half-up hairstyle can create the classic princess feeling many brides want. Curl the hair and gently tease the crown for height.
Pull the upper sections toward the back and secure them with pins. Keep the lower curls loose.
Add small crystal pins around the gathered section. Then place the veil slightly above the pins.
You can create the look without a costly tiara. A few inexpensive crystal pins can provide a similar sparkle.
This hairstyle works especially well with ballgowns, sweetheart necklines, and dramatic wedding dresses.
If your hair is fine, use a small amount of mousse before drying. This can help the crown hold its shape.
Avoid teasing too aggressively. Gentle volume is easier to brush out after the celebration.
Take photos from the front, side, and back during your trial. You can then adjust the crown height and veil placement.
The finished style feels romantic while still being practical enough for a full day of wedding activities.
Classic Low Bun With a Fingertip Veil
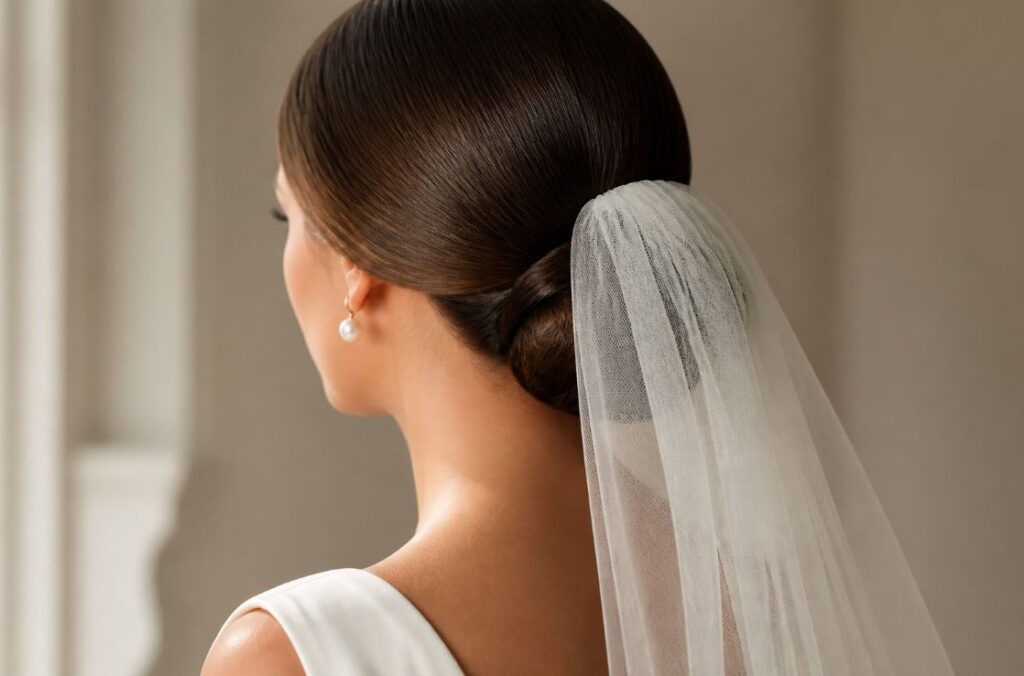
A classic low bun is one of the easiest bridal hairstyles to pair with a veil. Create a low ponytail and twist the hair into a smooth bun.
Secure it with several bobby pins. Place the fingertip veil above or below the bun depending on the shape you prefer.
For a simple wedding budget, skip an expensive hairpiece. A clean bun and well-made veil can look polished on their own.
You can add one small pearl pin if you want a decorative detail. Keep it close to the veil comb.
This hairstyle works with almost any gown shape. It looks especially graceful with open backs and detailed necklines.
If your hair is short, use a small bun insert to create extra fullness. These inserts are inexpensive and easy to hide.
Smooth the crown with a soft brush. Use a tiny amount of product to control flyaways.
Practice the hairstyle while wearing earrings and your veil. This gives you a better idea of the complete bridal look.
Curled Bob With a Short Veil
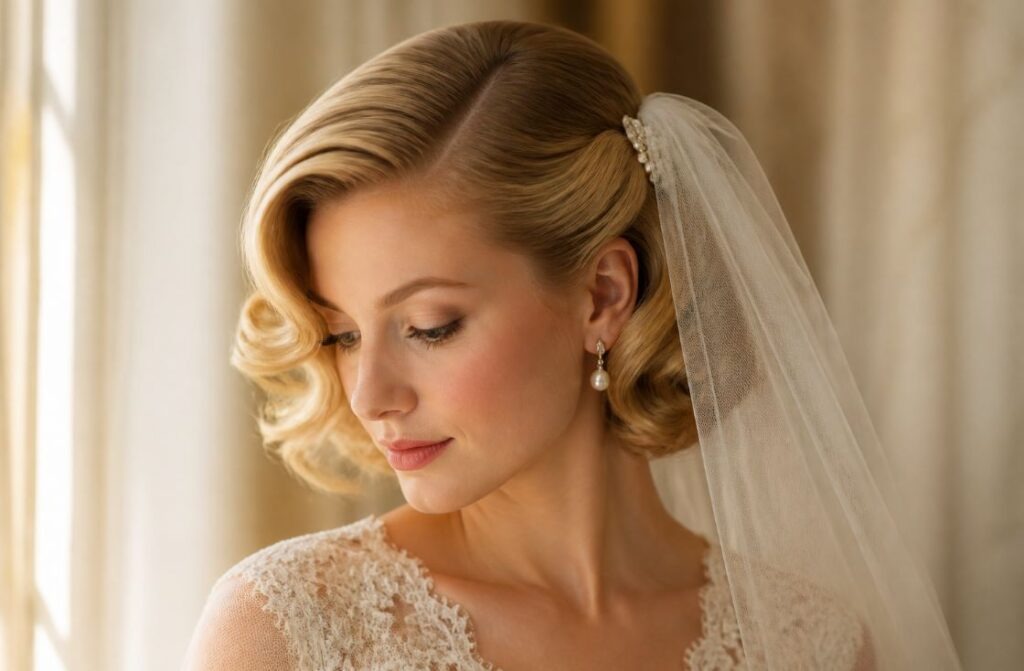
Short hair can look stunning with a veil. A curled bob creates a polished shape without requiring extra length.
Use a curling iron to create soft waves. Brush them gently after cooling so the curls form a smooth pattern.
Attach a short veil near the side part. A small comb or decorative clip can keep it secure.
For a budget-friendly accessory, choose a simple birdcage or shoulder-length veil rather than a heavily decorated design.
Pearl pins can add a bridal detail without covering the hairstyle.
This look works well with vintage dresses, modern gowns, and simple silhouettes. It also suits brides who want their haircut to remain visible.
If your hair is very fine, add a little texture spray before styling. Use only enough to give the curls shape.
Practice the veil placement with your earrings and neckline. Short hairstyles can change appearance quickly when accessories are added.
A bob does not require complicated styling to look bridal. Soft waves, one elegant veil, and a small accessory can create a complete wedding look.
Romantic Curly Bun With a Cathedral Veil

A curly bun gives you the security of an updo while keeping a soft appearance. Curl the hair before gathering it.
Bring the curls toward the back and pin them loosely into a bun. Leave a few curls near the temples and neckline.
Attach the cathedral veil above the bun. This creates a dramatic flowing shape behind the bride.
For a budget-friendly detail, use tiny crystal pins instead of a large comb. Place them around one side of the bun.
This style works beautifully with ballgowns, lace dresses, and romantic ceremonies.
If you have shorter hair, use a small curly hairpiece that matches your natural shade. Secure it beneath your own curls.
Keep the veil comb firmly anchored with hidden bobby pins. Long veils can pull on the hairstyle during movement.
During your trial, wear the full hairstyle for several hours. This gives you a practical idea of comfort and hold.
The result is soft, feminine, and photo-friendly while still being manageable throughout the celebration.
Soft French Twist With a Cathedral Veil
A soft French twist is a timeless bridal hairstyle that creates an elegant, polished silhouette while still feeling romantic and feminine. Start by brushing the hair toward one side at the back of the head, then gently twist the hair upward and tuck the ends inside the twist. Secure the style with several bobby pins, making sure they stay hidden beneath the hair. Keep the crown slightly relaxed instead of pulling everything completely flat, as a little volume can make the hairstyle feel softer and more flattering.
A cathedral veil looks especially beautiful with this hairstyle because it can be secured along the upper part of the twist while allowing the elegant updo to remain visible. For a budget-friendly finishing touch, add a few tiny pearl pins along one side instead of using a large decorative comb. This style pairs particularly well with satin gowns, bateau necklines, classic jewelry, and formal evening weddings. If your hair is shorter, hidden pins and a small amount of styling cream can help gather the ends neatly. Practicing the twist and veil placement before the wedding will also make the final styling process much easier.
Loose Rope Braid With a Chapel Veil
A loose rope braid is a beautiful choice for brides who want something textured, relaxed, and easy to personalize. Begin by dividing the hair into two sections and twisting both sections in the same direction. Then wrap them around each other in the opposite direction to create the signature rope effect. Once the braid is finished, bring it over one shoulder and gently loosen a few sections with your fingers. This creates a fuller, softer appearance rather than a tight and overly polished braid.
A chapel-length veil can be secured near the crown behind the braid, allowing the hairstyle to remain visible from the side. For an inexpensive decorative detail, weave a thin ivory ribbon through the braid or finish the end with a tiny floral accent. This hairstyle works especially well for outdoor ceremonies, rustic venues, garden weddings, and relaxed bridal gowns. Brides with naturally wavy hair can simply enhance their existing texture instead of spending time curling every section. A clear elastic and a few hidden pins will help keep everything secure throughout the celebration.
Pearl Headband With Loose Bridal Waves
A pearl headband paired with loose bridal waves creates a classic princess-inspired look without requiring a complicated updo. Start by styling the hair into large, soft curls using a curling iron or wand, allowing each curl to cool before gently separating it with your fingers. Avoid brushing the curls too aggressively because the goal is to maintain a smooth, flowing texture. Once the waves are ready, place a slim pearl headband across the crown so it becomes a subtle focal point.
The veil can be attached behind the headband, allowing the pearls to remain visible from the front while the veil flows naturally down the back. Brides on a budget can choose a simple pearl headband from a regular accessory store instead of purchasing an expensive bridal piece. This hairstyle works beautifully with ballgowns, satin dresses, sweetheart necklines, and romantic wedding settings. If your hair is fine, adding gentle root volume before placing the headband can prevent the style from looking flat. Small pins can also be used to keep the headband securely in place throughout the ceremony and reception.
Romantic Side Bun With a Fingertip Veil
A romantic side bun creates an elegant asymmetrical shape that looks especially beautiful in wedding photographs. Begin by curling the hair into soft waves and gently sweeping it toward one shoulder. Gather the hair near the lower side of the head and twist it into a relaxed bun, securing the shape with several bobby pins. Leave a few soft curls around the face to prevent the hairstyle from looking too structured and to create a flattering frame.
A fingertip veil can be attached just above the side bun, with the comb positioned slightly toward the center for better balance. A small pearl clip placed at the bun can provide a delicate decorative detail without overwhelming the hairstyle. This look works particularly well with one-shoulder gowns, detailed backs, classic earrings, and romantic venues. If your hair is slippery, lightly teasing the section beneath the bun can give the pins a better grip. During your bridal trial, walk around with the veil attached to make sure the comb remains comfortable and does not pull the hairstyle sideways.
Long Loose Curls With a Juliet Veil
Long loose curls combined with a Juliet veil create a romantic look with a subtle vintage influence. Begin by styling the hair into large, relaxed curls and allow them to cool completely before separating them with your fingers. Keeping the curls soft rather than highly structured will make the hairstyle feel more natural and effortless. A Juliet veil rests over the crown and gently frames the sides of the face, giving the entire look a graceful old-world character.
Secure the veil discreetly near the sides of the head so it remains stable without covering too much of the hairstyle. For an affordable customization, a simple veil can be finished with a narrow lace trim that coordinates with the gown. This style is especially lovely for garden ceremonies, vintage-inspired weddings, lace gowns, and romantic venues. Brides with naturally curly hair can simply define their curls with a lightweight styling product rather than using extensive heat. Keeping the front sections soft is important because the veil already adds framing around the face.
Voluminous Half-Up Pony With a Cathedral Veil
A voluminous half-up ponytail is an excellent option for brides who want the freedom of wearing their hair down while still having a secure and lifted shape. Start by curling the entire head in sections, allowing the curls to cool before gently separating them. Gather the upper sections near the crown and secure them into a ponytail while leaving the lower curls flowing freely down the back. Gently tease the ponytail to create fullness, then smooth only the surface so the volume remains natural.
A cathedral veil can be attached behind the ponytail, allowing it to flow dramatically over the curls without completely hiding them. For a simple and affordable finishing touch, wrap a narrow satin ribbon around the ponytail base. This hairstyle looks gorgeous with princess gowns, strapless dresses, sweetheart necklines, and dramatic wedding photography. Brides with fine hair can consider clip-in extensions if they need extra length or fullness. Avoid making the ponytail excessively tight because a softer structure will help the curls maintain their natural movement.
Waterfall Curls With a Lace Veil
Waterfall curls create a soft, romantic shape that looks especially beautiful underneath a long lace-edged veil. Begin by curling the hair in medium-sized sections and allowing every curl to cool before touching it. Once the hair has set, gently separate the curls using your fingers and allow them to fall naturally down the back. The goal is to create cascading movement rather than perfectly uniform curls.
A lace-edged veil can be attached near the crown, allowing its detailing to complement the gown. Brides who want to save money can purchase a simple veil and add lace trim along the edge themselves, provided the lace is lightweight enough not to pull on the veil. This hairstyle works beautifully with romantic gowns, outdoor ceremonies, lace dresses, and simple jewelry. If your hair is naturally wavy, you may only need to curl the front sections and areas that lack definition. Keep a few extra pins available during the reception because long curls and veils can shift while dancing.
Low Twisted Ponytail With a Blusher
A low twisted ponytail offers a polished bridal look without feeling overly formal or complicated. Begin with a middle part or a soft side part, depending on which framing looks best with your face. Gather the hair low at the back of the head and gently twist the ponytail before securing it. A small section of hair can be wrapped around the elastic to hide it, while soft waves through the lengths add movement and texture.
A blusher veil can be positioned over the face and attached near the crown, creating a traditional bridal moment for the ceremony. For a budget-friendly option, choose a simple tulle blusher with a small comb and add a narrow ribbon edge if desired. This hairstyle works particularly well with satin gowns, classic jewelry, minimalist dresses, and elegant wedding venues. Use a small amount of smoothing product around the crown without making the lengths stiff. Practicing how to lift the blusher before the ceremony will help you move it back smoothly without disturbing the ponytail.
Messy Braided Updo With a Chapel Veil
A messy braided updo combines the security of an updo with the relaxed texture of loose braids. Start by creating soft curls throughout the hair, then divide sections into one or two simple braids. Bring the braids toward the back of the head and pin them into a low, relaxed updo. Leave several delicate tendrils around the face to create a romantic, effortless finish.
A chapel-length veil can be secured above the updo so it flows naturally down the back. Tiny faux flowers can be tucked between the braids for an inexpensive decorative detail, especially for outdoor or garden weddings. This hairstyle pairs beautifully with lace gowns, rustic venues, floral accessories, and relaxed bridal styles. There is no need for perfect symmetry because the charm comes from the slightly undone texture. Use stronger hidden pins underneath the braid and smaller decorative pins on top for better support. Wearing the style during your trial for several hours can help identify any areas that need additional pins.
Sleek High Ponytail With Cathedral Veil
A sleek high ponytail creates a modern, confident bridal look while still feeling dramatic and princess-inspired when paired with a cathedral veil. Begin by brushing the hair upward and securing it near the crown, making sure the ponytail is firm without becoming uncomfortable. Wrap a section of hair around the elastic to conceal it and secure the end underneath with a discreet pin.
The cathedral veil can be attached close to the ponytail base, creating a long flowing line behind the bride. A simple pearl elastic or satin ribbon can provide a subtle decorative detail without taking attention away from the clean hairstyle. This look pairs especially well with modern gowns, minimalist dresses, statement earrings, and contemporary venues. Brides who need additional length can use a matching ponytail extension. A small amount of smoothing cream can control flyaways, while a clean toothbrush can help tame tiny hairs around the hairline. Practice walking, turning, and moving with the veil attached to ensure everything stays comfortable.
Romantic Crown Braid With Pearl Pins
A romantic crown braid gives the hairstyle a delicate, feminine appearance while keeping the hair beautifully structured. Begin by creating a braid along one side of the head and gradually continue it around the crown. Once the braid reaches the opposite side, secure it behind the ear and hide the remaining end beneath the loose curls. This creates the impression of a braided crown without requiring a complicated full updo.
Scattered pearl pins can be placed along the braid to add subtle bridal sparkle. Keep the pearls spaced apart rather than clustering them together so the hairstyle remains elegant and lightweight. A fingertip veil can be attached behind the braid, allowing both the braid and veil to remain visible. This style works beautifully with lace gowns, floral dresses, garden ceremonies, and romantic venues. Brides with shorter hair can use clip-in extensions to create additional length for the braid. Take photographs from both the front and side during the trial to make sure the braid frames the face at the right height.
Soft Chignon With a Pearl Veil
A soft rounded chignon is a classic bridal hairstyle that looks polished while still maintaining a gentle romantic quality. Begin by gathering the hair into a low ponytail and twisting it into a smooth rounded bun. Secure the bun with several hidden pins and keep the crown slightly soft rather than completely flat. This subtle volume can prevent the hairstyle from looking overly severe.
Add a few small pearl pins around the chignon for understated decoration, then attach the veil just above the bun. Brides looking for an affordable alternative to an elaborate comb can simply purchase loose pearl hairpins and arrange them individually. The style works beautifully with pearl earrings, classic gowns, satin dresses, and timeless wedding settings. If your hair is fine, a small bun insert can provide extra fullness without requiring additional hair. Practice the complete hairstyle with the veil before the wedding so you know exactly where the most secure attachment point will be.
Loose Dutch Braid With a Long Veil
A loose Dutch braid creates a raised woven pattern that adds beautiful texture to the back of a bridal hairstyle. Start near the crown and cross the outer sections underneath the center section instead of over it. Continue the braid down the back and secure the end with a clear elastic. Once the braid is secure, gently pull on the outer loops to make it appear fuller and softer.
Attach a long veil above the braid so the veil flows naturally behind the bride without completely covering the braid. A narrow satin ribbon woven through a small section can add a personalized detail without requiring an expensive accessory. This hairstyle works especially well for outdoor ceremonies, bohemian weddings, floral settings, and flowing gowns. If the braid feels too tight, gently loosen the outer sections after securing it. Practice the hand placement several times before the wedding because the technique becomes much easier once the movements feel familiar.
Soft Side Part With Pearl Veil
A soft side part is a simple styling choice that can dramatically change the overall appearance of a bridal hairstyle. Begin by curling the hair into loose waves and brushing them gently until they form a smooth, flowing texture. Create a natural side part and sweep the fuller section over one shoulder. This adds asymmetry while still keeping the hairstyle elegant.
A pearl veil can be attached near the crown close to the side part, creating a subtle focal point around the upper portion of the hairstyle. Brides on a budget can use a plain veil paired with a small pearl comb instead of purchasing an elaborate accessory. This style complements classic gowns, satin dresses, pearl jewelry, and traditional wedding venues. If the hair tends to fall flat, add gentle root volume before creating the part. Taking a few photographs in natural light during the trial can help you see how the pearls contrast with your hair color.
Curly Half-Up With Floral Pins
A curly half-up hairstyle is a beautiful option for brides who want their hair to feel romantic and soft while keeping the front controlled. Start by curling the hair in medium-sized sections, allowing the curls to cool before gently separating them. Gather the upper sections behind the head and secure them together, leaving the lower curls flowing freely.
Small floral pins can be placed around the gathered section to create a delicate garden-inspired detail. Keep the flowers lightweight and use only a few so they do not compete with the veil or gown. Attach a fingertip veil behind the floral details for a soft finishing effect. Brides looking for an affordable option can use small faux flowers attached to plain bobby pins. This hairstyle is especially lovely for garden weddings, floral gowns, outdoor ceremonies, and romantic settings. Naturally curly brides can simply define their existing curls rather than using heat throughout the entire hairstyle.
Low Bubble Ponytail With a Cathedral Veil
A low bubble ponytail offers a playful and contemporary alternative to traditional bridal hairstyles. Start by gathering the hair into a low ponytail and securing it at the nape. Place additional small elastics down the length of the ponytail at even intervals, then gently pull the hair between each elastic outward to create rounded bubble sections.
Attach the cathedral veil near the crown so it flows dramatically behind the hairstyle. Clear elastics make an affordable choice, while a small satin ribbon can be wrapped around the top elastic for a more finished appearance. This style works particularly well with modern gowns, minimalist dresses, sleek venues, and contemporary wedding themes. Keep the bubbles relatively small for a polished result rather than making each section excessively large. Smooth the crown with a light styling cream before securing the ponytail. Practicing the elastic spacing ahead of time will help keep each bubble even.
Romantic Low Twist With a Juliet Veil
A romantic low twist creates a simple vintage-inspired shape that works beautifully with a Juliet veil. Begin by sweeping the hair toward the back of the head and twisting it inward into a low shape. Secure the twist with several hidden pins, making sure the ends are tucked neatly inside. Leave a few soft curls around the face to maintain a relaxed and feminine appearance.
Place the Juliet veil over the crown so it gently frames the face and complements the low twist. A narrow lace ribbon near the attachment point can provide an inexpensive vintage detail. This hairstyle pairs particularly well with lace gowns, antique-inspired accessories, garden ceremonies, and historic wedding venues. Use lightweight styling products to keep the hair soft and touchable rather than stiff. Practice the twist from several angles during your bridal trial to ensure all the ends remain hidden and the veil sits comfortably.
Long Braided Ponytail With a Fingertip Veil
A long braided ponytail combines the practicality of a secure ponytail with the texture of a traditional braid. Begin by creating a high or medium ponytail and securing it firmly. Divide the ponytail into three sections and create a classic three-strand braid. Once finished, gently loosen the outer sections to make the braid look fuller and more relaxed.
Attach a fingertip veil above the ponytail so it flows naturally behind the bride. An ivory ribbon wrapped around the braid end can add a simple and inexpensive finishing detail. This hairstyle works beautifully with outdoor weddings, simple gowns, modern dresses, and relaxed bridal styling. Brides with shorter hair can use clip-in extensions to achieve the desired length and fullness. Make sure the ponytail is securely anchored before beginning the braid because it provides the foundation for the entire hairstyle.
Romantic Crown With a Long Tulle Veil
A loose braided crown combined with a long tulle veil creates an effortlessly romantic bridal silhouette. Begin by forming a soft braid around the crown, keeping the braid slightly relaxed instead of pulling it tightly against the head. Allow the remaining hair to fall down the back in loose waves, creating contrast between the structured braid and flowing lengths.
Attach the long tulle veil behind the braided crown so both elements remain visible. Brides who want an affordable option can use plain tulle with a simple comb, allowing the length and movement of the fabric to provide the dramatic effect. A few pearl pins can be added if extra detail is desired. This hairstyle works especially well with flowing gowns, garden ceremonies, outdoor portraits, and romantic wedding themes. Keep the braid comfortable because a tightly pulled crown can become uncomfortable after several hours.
Sleek Bun With a Lace Cathedral Veil
A sleek low bun provides the perfect foundation for a dramatic lace cathedral veil because it keeps the hairstyle simple while allowing the veil to become the main focal point. Start by creating a smooth middle part and pulling the hair toward the nape. Twist the hair into a compact bun and secure it firmly with hidden pins.
The lace cathedral veil can be attached either just above or beneath the bun depending on how you want the lace to frame the hairstyle. Brides looking to save money can choose a simple veil with lace edging instead of purchasing an elaborate decorated headpiece. This style works especially well with lace gowns, clean necklines, pearl earrings, and elegant formal venues. Use only a small amount of smoothing product to control flyaways while keeping the hair polished. Simple jewelry is often best because it allows the lace veil to remain the main decorative feature.
Soft Waves With a Crystal Comb
Soft waves are a timeless bridal choice that can be dressed up easily with a delicate crystal comb and veil. Begin by curling the hair in large sections and allowing each curl to cool completely. Gently brush through the curls to transform them into smooth, flowing waves rather than defined ringlets.
Place a small crystal comb toward the back of the head and secure the veil underneath it. This allows the crystal detail to remain visible while the veil flows naturally behind the bride. An inexpensive crystal comb can create a similar effect to a larger bridal headpiece without adding unnecessary expense. This hairstyle works with almost every gown silhouette, from simple satin dresses to romantic lace designs. Brides with naturally wavy hair can simply enhance the sections that need more definition. A light styling spray can help maintain the waves while keeping them soft and touchable.
Braided Bun With Baby’s Breath Veil
A braided bun combines structure and texture with the delicate beauty of baby’s breath flowers. Begin by creating a low braid and then wrap the braid around itself to form a bun. Secure it carefully with hidden pins, making sure the braid remains visible rather than completely tucked away.
Small baby’s breath pieces can be placed around one side of the bun to create a fresh garden-inspired accent. The veil can then be attached behind the flowers so it flows naturally without covering the decorative details. Brides looking for a budget-friendly option can use lightweight faux baby’s breath attached to plain bobby pins. This hairstyle is particularly suitable for garden weddings, outdoor ceremonies, simple gowns, and romantic floral themes. Keep the flowers small and delicate so they enhance the hairstyle instead of overwhelming it.
Romantic Waves With a Blusher Veil
Romantic loose waves paired with a blusher veil create a timeless bridal look with a beautiful traditional element. Begin by creating large curls throughout the hair, then gently brush them into soft waves once they have cooled. Keep the front sections smooth or lightly waved so the hairstyle remains clean beneath the veil.
Attach the blusher near the crown so the tulle falls naturally over the face during the ceremony. For an affordable option, choose a simple tulle blusher with a small comb rather than an elaborate decorated veil. This hairstyle works beautifully with classic gowns, romantic dresses, pearl jewelry, and traditional wedding settings. Use a small amount of styling spray to help the waves maintain their shape. Before the wedding day, practice lifting the blusher so you can move it back smoothly without disturbing the hairstyle.
Textured French Twist With Pearl Pins
A textured French twist offers a softer and more relaxed interpretation of the classic bridal updo. Begin by sweeping the hair backward and twisting it upward, then tuck the ends inside the twist and secure everything with hidden pins. Unlike a perfectly smooth French twist, this version should retain subtle texture and movement throughout the hair.
Leave a few delicate strands around the face for a romantic finish and place scattered pearl pins along one side of the twist. A fingertip veil can be attached behind the updo, allowing the pearls and textured hairstyle to remain visible. Brides who want to keep costs low can purchase individual pearl pins instead of a large bridal comb. This hairstyle works beautifully with satin dresses, classic gowns, pearl jewelry, and elegant venues. Keep the texture relaxed so the finished look feels modern and romantic rather than overly stiff.
Curled Low Ponytail With Lace Veil
A curled low ponytail is comfortable, practical, and surprisingly elegant for a wedding day. Begin by curling the hair before gathering it so the ponytail has plenty of soft movement. Secure the hair at the nape and wrap a small section around the elastic to hide it. Leave a few face-framing waves loose around the front for a romantic effect.
A lace-trimmed veil can be attached just above the ponytail, creating a beautiful contrast between the simple hairstyle and detailed veil. Brides who want a DIY option can add lightweight lace trim to a plain veil. This style works especially well with flowing gowns, lace dresses, outdoor weddings, and relaxed bridal themes. A few hidden pins can provide extra support around the veil attachment. The result is feminine and polished without feeling overly complicated.
Princess Bun With a Blusher Veil
A rounded princess-inspired bun creates a classic silhouette that pairs beautifully with a traditional blusher veil. Start by gathering the hair into a high or medium-height bun, depending on the gown and desired profile. Smooth the crown while keeping enough volume to prevent the hairstyle from looking too flat. Secure the bun with several strong pins so it remains stable throughout the day.
Add a few subtle crystal pins around the base of the bun for a touch of sparkle, then position the blusher veil near the crown. Brides can save money by using individual crystal hairpins instead of purchasing a tiara or elaborate headpiece. This hairstyle looks especially beautiful with ballgowns, sweetheart necklines, pearl jewelry, and princess-inspired wedding themes. Make sure the bun is secure but comfortable because you will likely be wearing it for many hours.
Bohemian Side Braid With a Cathedral Veil
A loose side braid creates an effortless bohemian bridal look that works beautifully for outdoor and nature-inspired weddings. Sweep the hair over one shoulder and create a simple three-strand braid. Once the braid is secure, gently loosen a few sections to give it a fuller, softer appearance.
Attach the cathedral veil behind the crown so the long fabric flows down the back while the braid remains visible from the side. For a DIY touch, weave a narrow ivory ribbon through the braid or add a small dried floral detail. This hairstyle works particularly well with flowing gowns, meadow ceremonies, rustic venues, and bohemian wedding themes. Use a few discreet pins to control loose sections without making the braid look too polished. The key is to maintain a relaxed texture that feels natural and romantic.
Glossy Waves With a Pearl Cathedral Veil
Glossy waves create a refined and luxurious bridal appearance, especially when paired with a pearl-detailed cathedral veil. Begin by curling the hair in large sections and allowing each curl to cool before brushing them gently into smooth waves. The finished texture should be polished and flowing rather than tightly curled.
Attach the pearl cathedral veil near the crown so its details remain visible while the long fabric extends dramatically behind the bride. If the decorated veil is outside your budget, a plain veil paired with a small pearl comb can create a similar effect. This hairstyle looks especially sophisticated with satin gowns, pearl earrings, minimalist accessories, and elegant venues. Apply smoothing cream sparingly around the crown to control flyaways without making the hair look heavy. Keeping the waves soft will maintain the graceful movement of the overall look.
Loose Braided Updo With Fingertip Veil
A loose braided updo gives brides the best of both worlds by offering the security of an updo with the relaxed texture of braids. Begin by creating two simple braids from the sides of the head. Bring them toward the back and pin them into a low bun, overlapping the braids to create additional texture.
Leave a few soft curls around the face for a romantic finish and attach the fingertip veil above the braided sections. Tiny pearl pins can be placed between the braids for a subtle decorative accent. This hairstyle works especially well with lace gowns, garden ceremonies, outdoor portraits, and romantic wedding themes. Use hidden pins underneath the braids to provide additional support without making them visible. A bridal trial is important because it allows you to adjust the placement and make sure the hairstyle remains comfortable.
Soft Curly Bob With Birdcage Veil
A soft curly bob is an excellent choice for brides with shorter hair who want a vintage-inspired bridal look. Begin by creating gentle waves throughout the bob, focusing on smooth definition rather than tight curls. A side part can add an elegant vintage shape and provide the perfect location for attaching the birdcage veil.
Position the birdcage veil near the fuller side of the part and secure it discreetly. A simple birdcage veil with minimal decoration can be an affordable alternative to a heavily embellished bridal accessory. Pearl earrings can complete the vintage-inspired appearance without adding too much detail around the hair. This hairstyle works beautifully with classic bridal dresses, shorter gowns, vintage venues, and retro wedding themes. During your trial, test the veil placement with your earrings and neckline so the overall look feels balanced.
Half-Up Braid With Cathedral Veil
A half-up braid gives loose hair more structure while allowing the curls to cascade freely down the back. Begin by curling the lower sections first so the finished hairstyle has plenty of movement. Gather the upper sections and create a simple braid at the back, securing it discreetly with pins or a small elastic.
Attach the cathedral veil just above the braid so the veil flows over the lower curls without completely hiding them. Two or three small crystal pins can add a subtle touch of sparkle without making the hairstyle look too decorated. This style works particularly well with romantic gowns, open-back dresses, garden ceremonies, and elegant wedding portraits. Keep the braid slightly loose rather than tightly pulled to maintain a soft bridal appearance. The combination of structured braiding, flowing curls, and a dramatic veil creates a balanced and feminine result.
Low Knot With a Long Sheer Veil
A low knot is one of the simplest bridal hairstyles and can be surprisingly elegant when paired with a long sheer veil. Begin by gathering the hair into a low ponytail at the nape and twisting it into a compact knot. Secure the knot with several bobby pins, making sure the foundation feels stable.
Leave a few delicate strands around the face to soften the appearance and attach the long sheer veil just above the knot. Because the hairstyle itself is minimal, the veil can become the main decorative feature. This makes the look especially budget-friendly because there is little need for additional hair accessories. The style works beautifully with minimalist gowns, statement earrings, clean necklines, and contemporary venues. A small amount of smoothing cream around the crown can control flyaways while keeping the overall finish natural.
Romantic Waves With Floral Crown and Veil
Romantic waves combined with a floral crown create an enchanting bridal hairstyle that feels especially natural for garden and outdoor ceremonies. Start by creating soft curls throughout the hair and gently separating them with your fingers to form loose waves. Avoid making the curls too structured because the goal is to create an effortless, flowing texture.
Place a delicate floral crown across the crown of the head and attach the veil behind it so both accessories remain visible. Brides who want an affordable option can create a simple floral crown using faux flowers and floral wire. Choose blooms and greenery that coordinate with the bridal bouquet for a cohesive appearance. Keep the crown lightweight so it remains comfortable throughout the ceremony and reception. This hairstyle works beautifully with flowing gowns, floral wedding themes, garden venues, and soft romantic photography.
Sleek Chignon With Pearl-Edged Veil
A sleek chignon offers a sophisticated and polished bridal silhouette, especially when paired with a pearl-edged veil. Begin by creating a clean middle part and pulling the hair toward the nape. Twist the hair into a compact bun and secure it with several hidden pins, keeping the shape smooth and controlled.
Attach the pearl-edged veil just above the bun so the delicate border is visible around the hairstyle. Brides who want a more affordable option can choose a simple veil with a narrow pearl trim instead of a heavily decorated bridal piece. This look pairs beautifully with satin gowns, clean necklines, pearl earrings, and minimalist wedding styling. A small amount of smoothing cream can help control flyaways without making the hair appear greasy or overly stiff. Keep the bun compact and comfortable so the hairstyle remains polished throughout the entire celebration.
Soft Princess Curls With a Cathedral Veil
Soft princess curls create a romantic final look that captures the elegance of a classic fairytale bride. Begin by curling the hair in medium-sized sections and allowing every curl to cool completely before gently separating it. Keep the crown slightly lifted by teasing the roots lightly or pulling a few sections toward the back and securing them with hidden pins.
Two or three pearl pins can be placed near the gathered section for a subtle princess-inspired detail. Attach the cathedral veil just above the pins so the fabric flows naturally behind the curls and gown. Brides looking to save money can choose an affordable plain veil and decorate the hairstyle with a few individual pearl pins instead of purchasing an expensive headpiece. This style works beautifully with ballgowns, sweetheart necklines, pearl jewelry, romantic venues, and dramatic wedding portraits. If your hair is naturally wavy, enhance only the front and uneven sections to reduce heat styling. Keeping a few extra pins in your bridal emergency kit can also help secure loose curls or the veil after dancing.
Final Thoughts
The perfect wedding hairstyle with a veil does not have to require a huge salon bill or complicated accessories. Soft curls, simple buns, relaxed braids, polished ponytails, and half-up styles can all create a beautiful bridal appearance. Start with your hair length, dress shape, veil length, and personal comfort. Then practice your favorite two or three ideas before the wedding. Try inexpensive pins, ribbons, faux flowers, or pearls to personalize the look. Most importantly, choose a hairstyle that lets you feel comfortable while celebrating, smiling, dancing, and taking photographs. A little preparation can turn a simple hairstyle into a beautiful princess-inspired bridal look.
