Planning a beautiful wedding does not have to mean spending a fortune on every detail. Wedding DIY ideas can add personality to your ceremony, reception, and guest experience while keeping costs manageable. From handmade centerpieces and ceremony signs to creative favors and photo displays, small projects can make the celebration feel personal. You can also choose projects that match your wedding theme, colors, venue, and budget. The best part is that many wedding crafts use simple supplies such as glass jars, cardstock, ribbon, candles, fabric, flowers, wood, and items you may already have at home. Here are practical DIY wedding ideas that can help you create a memorable day without overspending.
Create Handmade Wedding Invitations

Handmade wedding invitations can give your stationery a personal touch without requiring a large stationery budget. Start with quality cardstock in a shade that matches your wedding palette. Cream, white, dusty blue, blush, and sage are easy choices.
Add simple details such as ribbon, pressed flowers, wax-style seals, or a small botanical illustration. You can print the main design at home or through an affordable local printer.
For a polished look, keep the layout simple. Use one main paper color and one accent detail. Buying supplies in larger packs can lower the cost per invitation.
If you have a large guest list, reserve handmade details for the invitation itself while using standard envelopes. You can also make a few sample invitations before purchasing all your materials.
Ask a friend or family member to help with assembly. Turn the process into a relaxed afternoon with music and snacks.
This project works especially well for rustic, garden, boho, vintage, and minimalist weddings. Small handmade touches can make your invitations feel connected to the celebration before guests even arrive.
Turn Glass Jars Into Centerpieces
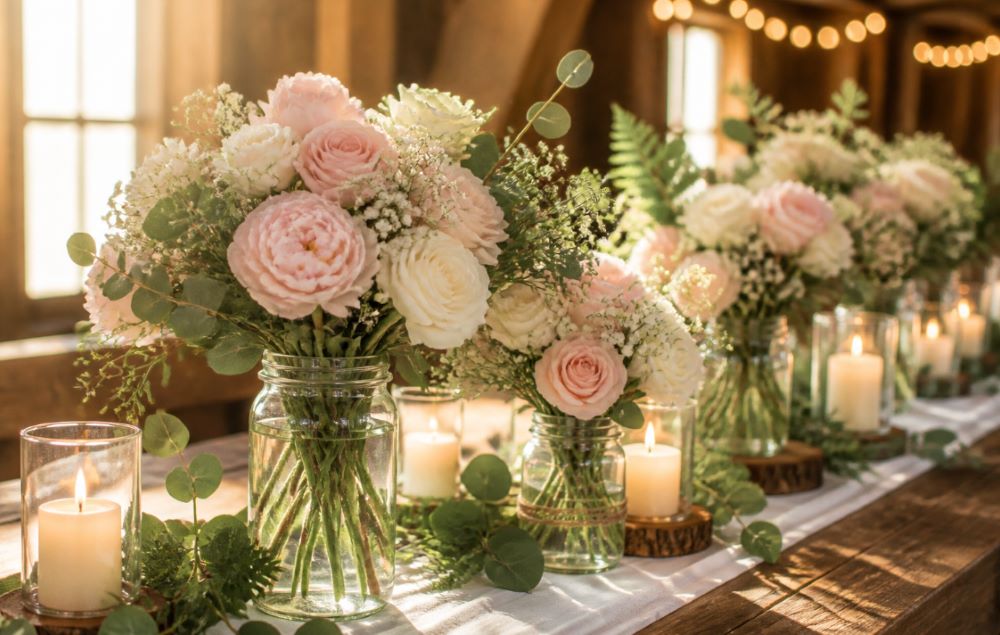
Glass jars are one of the easiest supplies for DIY wedding decorations. Save jars from sauces, desserts, preserves, or drinks and wash them thoroughly before decorating.
Wrap each jar with twine, lace, ribbon, or a narrow strip of fabric. You can also leave the glass plain for a clean minimalist appearance.
Fill the jars with seasonal flowers, baby’s breath, greenery, or a few stems from a local flower market. Small arrangements can look beautiful when grouped together.
For a rustic wedding, place jars on wooden slices. For a garden celebration, surround them with loose greenery and tea lights.
You do not have to use the same jar size everywhere. Mixing small and medium containers creates a relaxed tablescape.
Buy flowers from a farmers market or wholesale flower supplier when possible. Choose flowers that are naturally available during your wedding season.
Prepare the arrangements one day before the event if the flowers can safely remain hydrated. Ask trusted friends or relatives to help place them on tables.
This simple project can create beautiful wedding centerpieces for much less money than professionally designed arrangements.
Make Wooden Wedding Signs
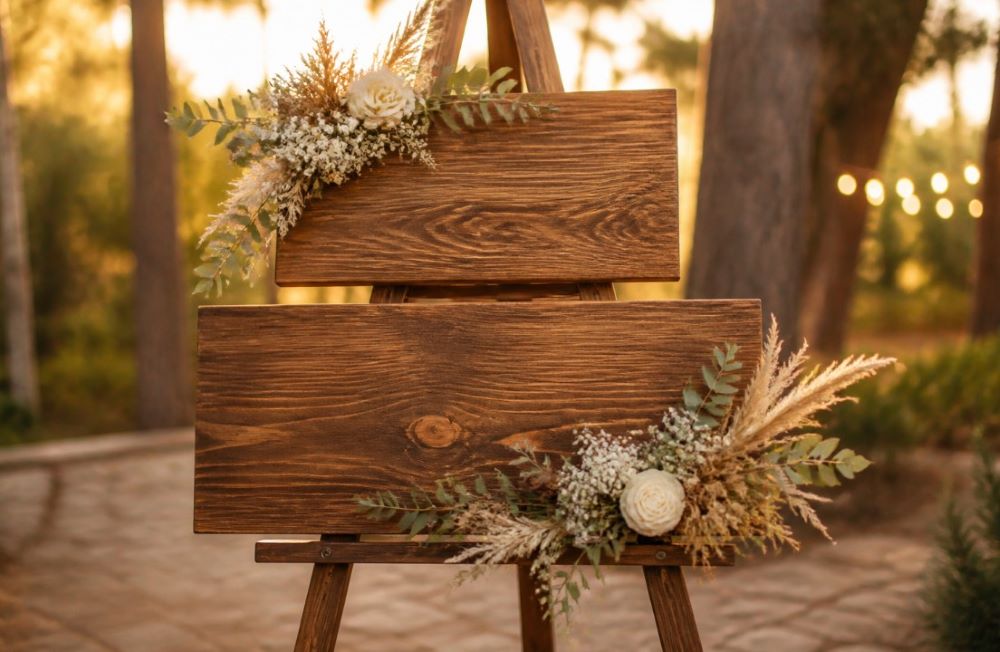
Wooden signs can add warmth to your ceremony or reception while giving you plenty of room for creativity. Look for inexpensive unfinished boards at craft stores, hardware stores, or online marketplaces.
Sand the surface lightly and apply a wood stain or paint that matches your wedding colors. White, natural wood, soft gray, and muted green can work beautifully.
You can use stencils to create the lettering. Another simple option is to print your design, trace the letters onto the wood, and paint over the outline.
Add small painted flowers, greenery, or a simple border around the edges. Keep the decoration limited so the sign remains easy to read.
Create separate signs for the ceremony entrance, seating area, bar, dessert table, guest book, or gift table.
If you have several signs, use the same material and decorative style so everything feels connected.
Ask someone artistic in your family to help with the lettering. This can turn a basic craft into a meaningful contribution from someone close to you.
After the wedding, some wooden signs can become keepsakes or home décor.
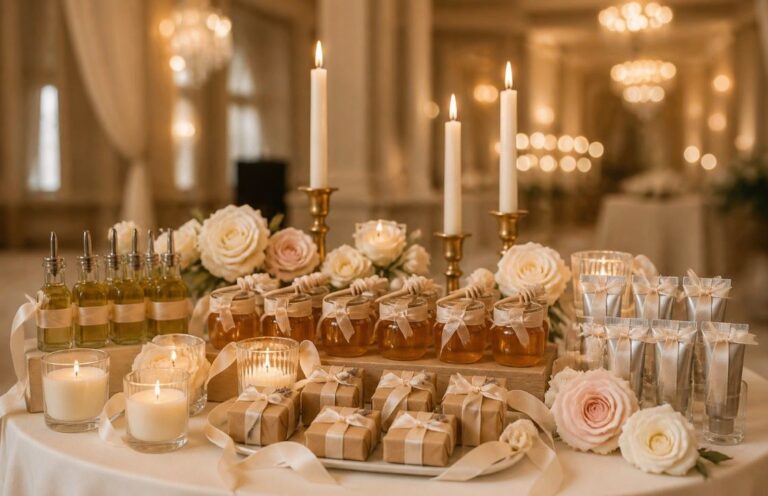
Craft Personalized Wedding Favors

DIY favors can be simple, useful, and affordable. Start by choosing something guests can enjoy rather than creating an elaborate decoration that may go unused.
Small jars of homemade cookies, tea blends, candies, spices, or coffee can work well. You can also package small candles, seed packets, or handmade soaps.
Use kraft boxes, glass jars, muslin bags, or small paper envelopes. Add ribbon, twine, dried flowers, or a tiny decorative charm.
Buying packaging in bulk can help lower the cost. Make a sample first so you can check the size and appearance before ordering supplies for every guest.
If you are preparing edible favors, choose a recipe that can be made ahead. Cookies, brownies, and dry snack mixes are often easier than delicate desserts.
Set aside a weekend for assembly. Invite family members or members of the wedding party to help.
Place favors at each seat or create a dedicated favor table. You can also use favors as part of the table décor.
A handmade favor does not have to be expensive. Thoughtful presentation can make a simple gift feel special.
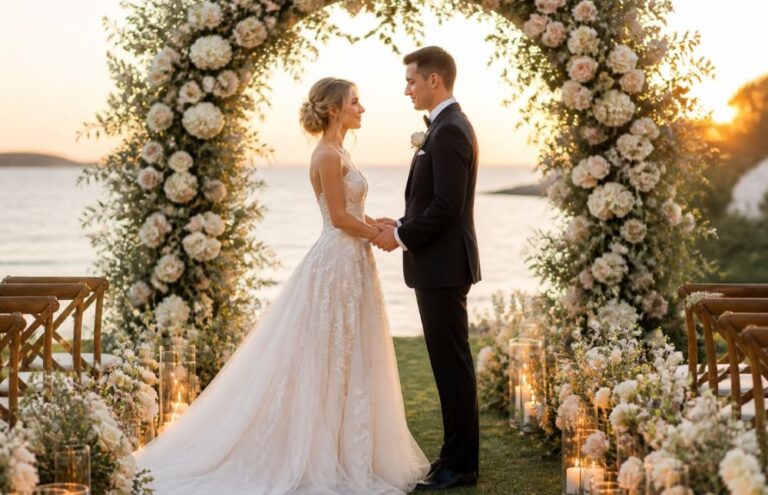
Build a Simple Floral Ceremony Arch
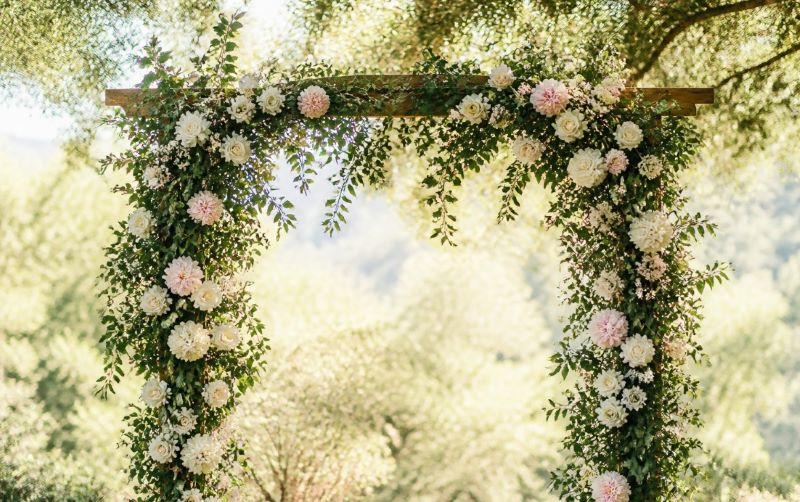
A DIY wedding arch can create a beautiful ceremony focal point without requiring a large floral budget. Start with a sturdy wooden frame or rental structure that fits your venue.
Instead of covering the entire arch with flowers, decorate only one corner or side. This creates an elegant appearance while using fewer stems.
Use greenery as the main material and add flowers in small clusters. Eucalyptus, olive branches, ferns, baby’s breath, and seasonal foliage can fill space affordably.
Choose flowers that are easy to arrange and available locally. You can also mix fresh greenery with dried flowers for added texture.
Secure every arrangement carefully with floral wire and suitable ties. Assemble as close to the ceremony as practical if using delicate flowers.
Ask a florist for flowers by the bunch rather than requesting a full arch service. This gives you more control over the design.
Have a friend help with setup so the frame stays stable while decorations are attached.
After the ceremony, move floral pieces to the reception. One DIY arch can serve multiple parts of the wedding day.
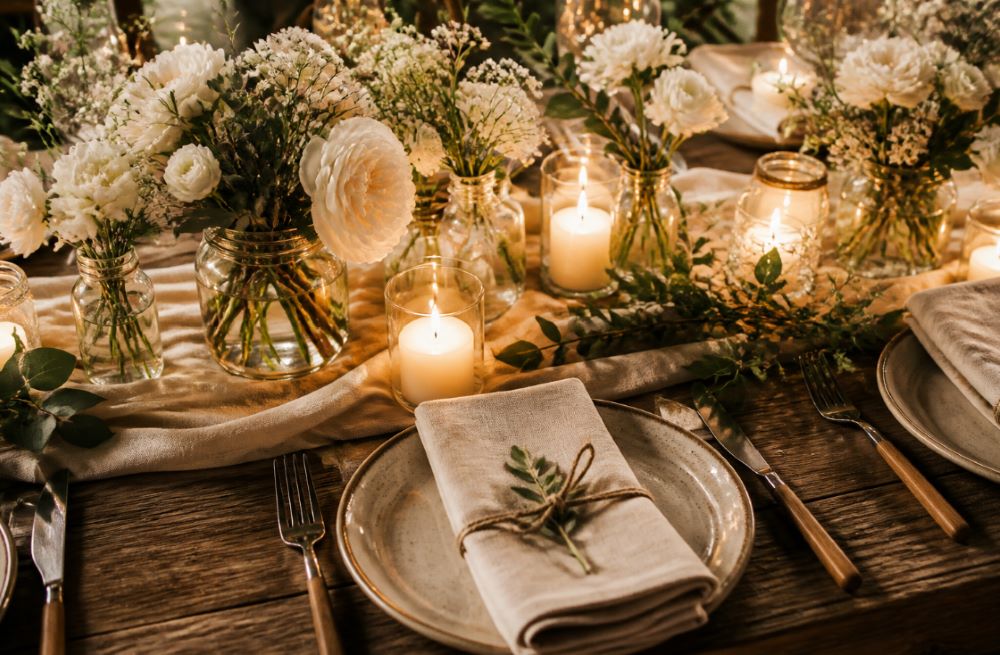
Design a Candlelit Reception Table
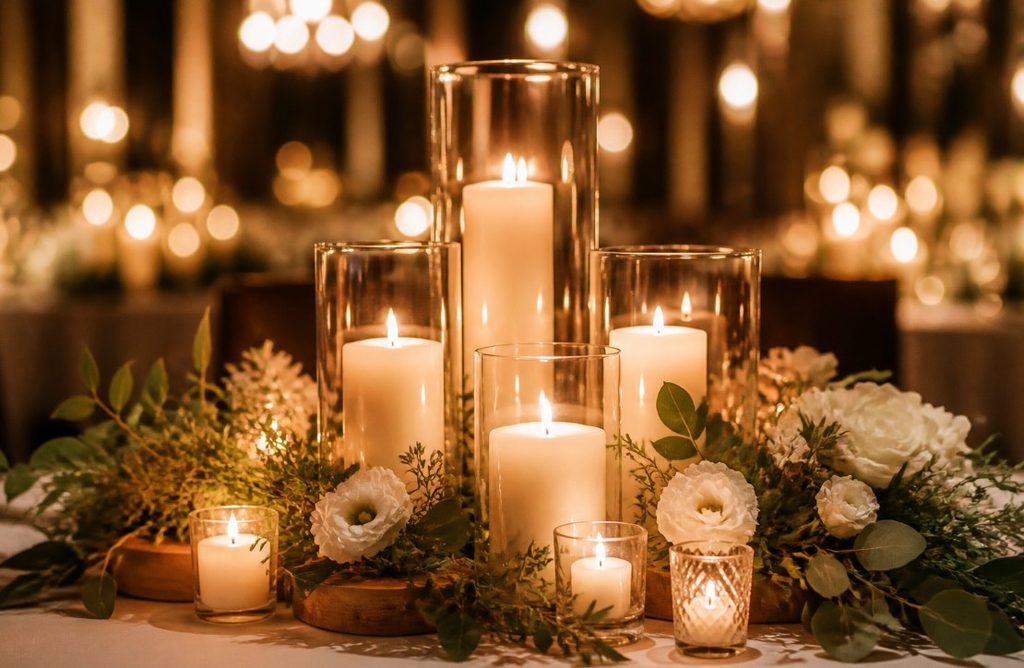
Candles can make a reception table feel warm and inviting. You can create an attractive display with inexpensive glass votives, pillar candles, or battery-operated candles.
Use different heights to create visual interest. Place taller candles toward the center and smaller ones around floral arrangements.
Glass holders can be found at craft stores, discount shops, thrift stores, or online marketplaces. Buy several styles if you want a relaxed tablescape.
For a cleaner appearance, keep the color palette limited. White candles with clear glass holders work with almost any wedding theme.
Add greenery around the holders, but keep leaves and fabric safely away from open flames. Battery-operated candles are a practical choice for venues with flame restrictions.
Create the table arrangement before the wedding so you know exactly how many candles you require.
Store each piece in labeled boxes after assembling the décor. This makes reception setup faster.
Candles also work beautifully around dessert tables, welcome tables, and outdoor lounge areas.
A simple candle display can create an elegant atmosphere using inexpensive supplies.
Create a Memory Photo Display

A photo display can bring meaningful memories into your wedding décor. Collect favorite photographs from childhood, family gatherings, trips, anniversaries, and your relationship.
Print the photos in several sizes to create a relaxed arrangement. You can use inexpensive prints from a local photo shop or home printer.
Attach the photographs to twine using small wooden clips. Hang the twine across a wooden frame, wire grid, ladder, or simple wall display.
Add greenery or small flowers around the edges. Avoid covering too much of the photography.
Another option is to place framed photographs along the guest book table or reception entrance.
Ask family members to contribute a few favorite photographs. This can create a display filled with stories from both sides of the family.
Choose copies rather than original photographs whenever possible. Protect printed pictures from moisture if your celebration takes place outdoors.
After the wedding, place the photographs into an album or memory box.
This project adds personal meaning to your wedding décor while using supplies that are easy to find.
Make DIY Table Numbers
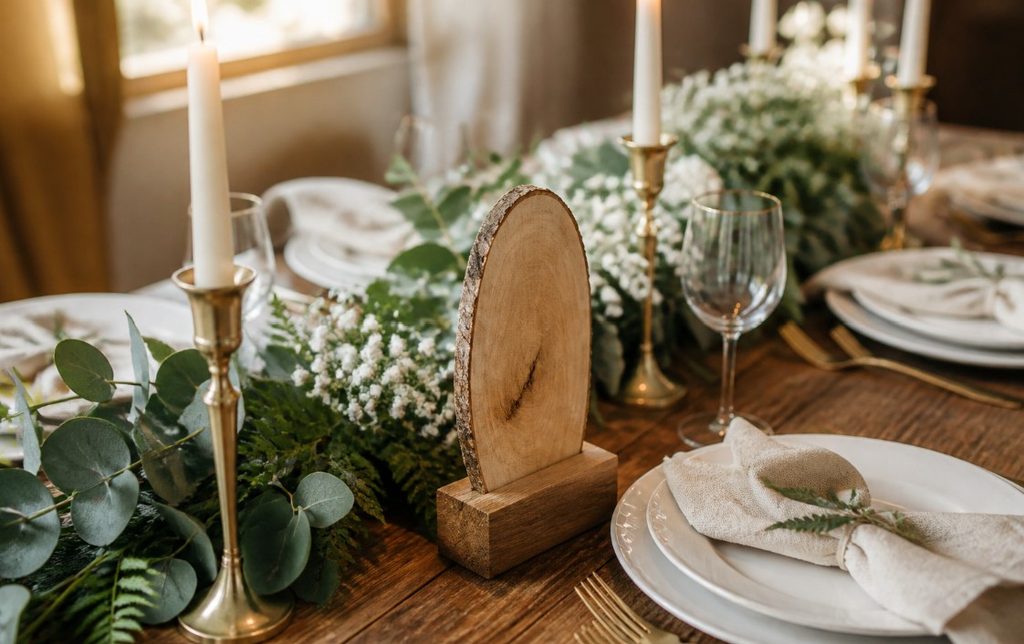
Table numbers are a small detail that can become part of your reception décor. You can create them from cardstock, wood, acrylic, glass frames, or small decorative stands.
For a rustic wedding, use small wooden blocks or painted wood slices. For a modern celebration, choose clean cardstock inside simple frames.
Add greenery, dried flowers, ribbon, or a thin painted border. Keep the design easy to reproduce across every table.
Create one finished sample before making the complete set. This helps you decide the correct size and placement.
If you are using cardstock, buy a large pack instead of individual sheets. A paper cutter can also help you create straight edges quickly.
Small frames from thrift shops can be painted to match your wedding palette. Mixing secondhand frames can create an interesting vintage appearance.
Ask a member of your wedding party to place the numbers during reception setup.
You can also use the same design for food labels, favor tags, or small signage.
A coordinated stationery set can make your reception tables look polished without requiring expensive printed materials.
Set Up a Creative Guest Book Station
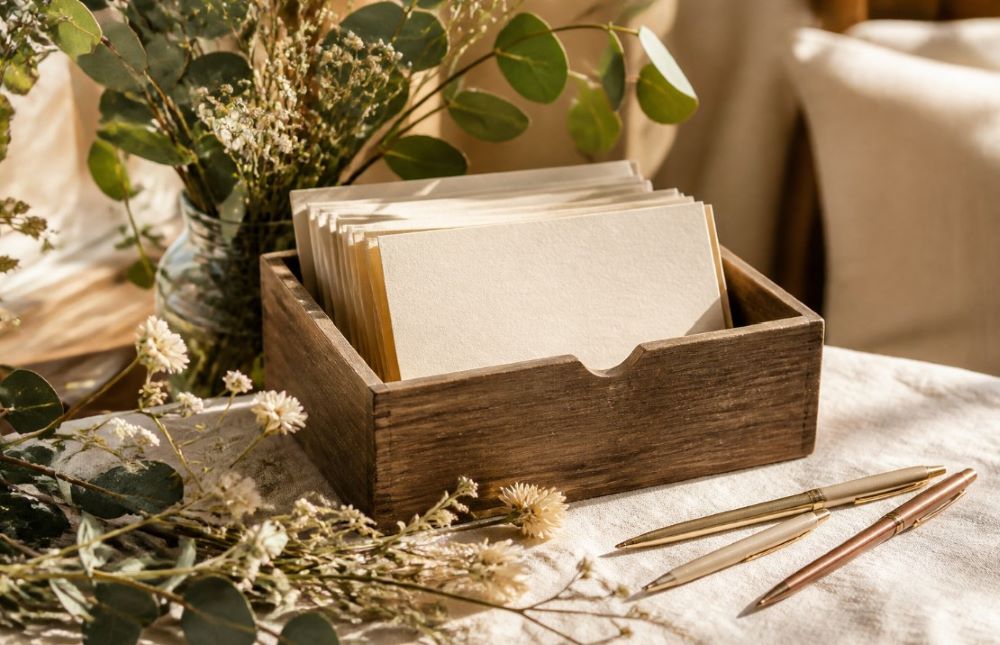
A traditional guest book is not the only way to collect wedding messages. A DIY guest book station can give guests several simple ways to leave a personal note.
Place blank cards, small envelopes, pens, and a decorative box on a table. Guests can write advice, memories, wishes, or short messages.
For a rustic theme, use kraft paper cards and a wooden box. For a romantic style, choose cream cardstock with ribbon and dried flowers.
You can also ask guests to write messages on small wooden hearts or paper leaves. Store them in a keepsake container after the wedding.
Keep several pens available so guests do not have to search for one. Place the station somewhere guests can easily see it.
Add a framed photograph of the couple near the table to make the area feel personal.
If you already own a decorative box, reuse it instead of buying a new guest book container.
After the wedding, arrange the notes in an album or memory box.
This project creates a lasting collection of messages that can be enjoyed long after the reception.
Decorate Chairs With Handmade Ribbons
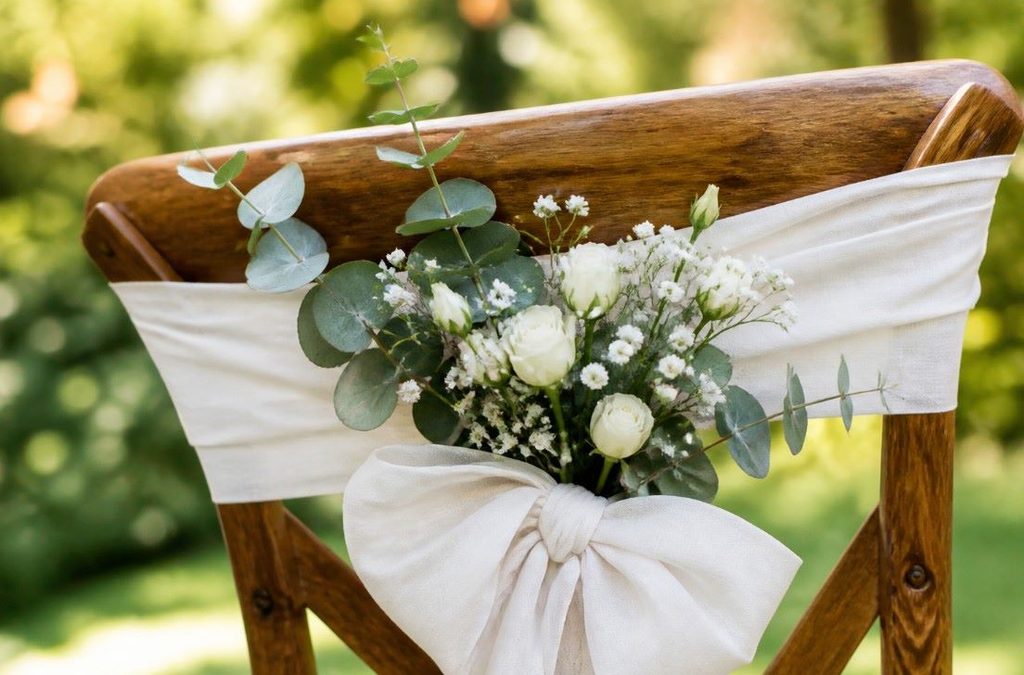
Chair decorations can transform a plain ceremony or reception setup with very little material. Ribbon, fabric strips, greenery, and small flowers are easy choices.
Choose one main fabric that matches your wedding colors. Satin, chiffon, linen, cotton, and gauze can each create a different appearance.
Tie simple bows around selected chairs rather than decorating every seat. The ceremony aisle chairs can receive the most attention.
Add one small greenery sprig beneath each bow for a natural look. Secure everything tightly so decorations remain in place.
For an outdoor wedding, use heavier ribbon or fabric that will not move easily in light wind.
Measure one chair before cutting all your ribbon. This prevents wasted material.
Buy fabric by the roll or bolt when possible. You can also check fabric remnants at local stores for discounted pieces.
Ask friends to help prepare the ribbons ahead of the wedding. Store completed pieces in bags by ceremony row.
After the ceremony, move some chair decorations to the sweetheart table or dessert area.
Small fabric details can make ordinary chairs feel wedding-ready.
Create Handmade Cake Decorations

You can create simple cake decorations without making the cake itself. This is a great way to personalize a professionally purchased or homemade cake.
Paper flowers, fabric bows, fresh greenery, berries, dried flowers, or wooden cake toppers can add character.
Choose decorations that match the rest of your wedding palette. A few carefully placed details can look more polished than a crowded cake.
If you make paper flowers, use food-safe picks or suitable barriers between decorative materials and the cake.
Small wooden shapes can also work well for rustic celebrations. Paint them in a shade that complements the reception décor.
Fresh flowers should be suitable for food presentation and handled carefully. Ask your baker about safe placement before adding anything to the cake.
You can also decorate the cake stand with ribbon or greenery instead of adding many items directly to the cake.
Practice your arrangement before the wedding day. Take a photograph so someone else can recreate it during setup.
This DIY project lets you personalize your cake while keeping the main baking work simple.
Make DIY Aisle Decorations

A wedding aisle can look beautiful with a few small handmade details. You do not have to cover the entire aisle with flowers.
Attach small floral jars to selected chairs using ribbon or sturdy hooks approved by your venue. Another option is to place small arrangements along the aisle edges.
Scatter a limited number of petals across the walkway if your venue allows it. Choose biodegradable petals for outdoor ceremonies.
For a rustic look, use small wooden crates, baskets, or lanterns filled with greenery. For a modern ceremony, use simple glass vessels.
Keep the walkway clear so guests and the wedding party can move safely.
Prepare each decoration ahead of time and label the pieces by aisle position. This makes setup much easier.
Ask someone from the wedding party to handle the arrangement before guests arrive.
After the ceremony, move the floral pieces to the reception tables or welcome area.
Using the same decorations in two locations can help you get more value from your wedding supplies while keeping the design cohesive.
Style a DIY Welcome Table
A welcome table gives guests their first glimpse of your wedding reception style. You can create one with items you already own.
Start with a small table covered in linen, cotton, or a simple table runner. Add a floral arrangement, candle holders, and a decorative tray.
Use a family heirloom, vintage vase, wooden box, or ceramic bowl as a meaningful accent.
You can also place practical items on the table, such as programs, fans, tissues, or small favors.
Keep the arrangement open enough for guests to reach everything easily. Avoid placing tall decorations where they block the entrance.
For a cohesive appearance, repeat colors and materials used elsewhere at the wedding.
Thrift stores can be useful for finding inexpensive vases, trays, frames, and candle holders. Look for pieces with shapes you like rather than focusing on exact colors since many items can be repainted.
Ask a friend to style the table using a photograph you prepared beforehand.
This approach creates a welcoming entrance without requiring a large decorating budget.
Arrange Seasonal Flowers in Mason Jars
Seasonal flowers are often a practical choice for DIY wedding arrangements. They are familiar, easy to source, and can create beautiful displays without complicated floral designs.
Choose two or three flower varieties and one type of greenery. Too many varieties can make arranging harder.
Mason jars provide an inexpensive container. Wrap the jars with twine or ribbon for a rustic appearance.
Fill each jar with water and trim the stems at an angle. Remove leaves that will sit below the water line.
Create several small arrangements rather than one large centerpiece. Grouping them across a table can create a fuller appearance.
Visit a local flower market and ask which blooms are abundant during your wedding season. Flowers sold by the bunch can be more affordable than ready-made arrangements.
Prepare jars and decorative elements ahead of time. Arrange delicate flowers closer to the event.
Have buckets, scissors, and water available during setup.
After the reception, guests can take arrangements home if your venue allows it.
Small seasonal arrangements can create a charming tablescape with basic supplies.
Give Guests Mini Plants
Mini plants can become memorable wedding favors and table decorations at the same time. Small succulents, herbs, or flowering plants work well for this project.
Buy plants in bulk from a garden center or local nursery. Choose varieties that are easy to care for and suited to your event season.
Place each plant in a small ceramic pot, terracotta container, or simple paper sleeve. Decorate the containers with ribbon, twine, or a tiny dried flower.
Arrange the plants along the favor table or place one at each guest seat.
If you are working with a tight budget, use smaller plants and let the greenery become part of the table décor.
Buy the containers separately if that offers a lower total price. Plain pots can also be painted before the wedding.
Water the plants according to their care requirements before the event. Avoid soaking them immediately before placing them on tables.
Provide a simple care card if you want guests to keep the plants long term.
This idea gives guests a living reminder of your wedding day and doubles as useful décor.
Sew or Cut Simple Table Runners
Table runners can change the appearance of reception tables without requiring expensive linens. Gauze, cotton, linen, burlap, and lightweight fabric can all work.
You do not have to sew the edges if you prefer a relaxed style. Cut the fabric neatly and allow the ends to fall naturally.
Measure your tables before buying material. Add enough length for the runner to hang slightly over each side.
For a rustic wedding, try natural linen or burlap. For a romantic celebration, soft gauze can create a delicate appearance.
You can also layer a narrow runner over standard venue linens.
Buy fabric by the roll or check clearance sections for discounted materials. If you have several tables, calculate the total yardage before purchasing.
Cut all runners in one session so their lengths remain consistent.
Fold and store them carefully before the wedding.
After the event, washable fabric can be reused for home décor, future celebrations, or craft projects.
A simple runner can give plain reception tables a finished appearance without costly rentals.
Build a Simple Photo Booth Backdrop
A DIY photo booth backdrop gives guests a fun place to take pictures. You can create one with fabric, streamers, paper flowers, greenery, or string lights.
Start with a simple stand or wall approved by your venue. Hang a large piece of fabric as the main background.
Add decorative elements along the edges rather than covering the entire backdrop. This keeps the project affordable.
Paper flowers can provide color without the cost of fresh blooms. Greenery garlands can create a natural appearance.
String lights can add warmth for evening photographs. Check venue rules before using electrical decorations.
Place the backdrop in an area with enough room for guests to stand comfortably. Keep walkways clear.
Add a small basket with simple photo props if desired. Hats, sunglasses, faux flowers, and frames can create playful pictures.
Ask a friend to assemble the backdrop rather than paying a decorator.
After the wedding, fabric can be reused for home projects and paper decorations can become party décor.
This is one of the easiest ways to create an interactive wedding feature on a modest budget.
Make Handmade Place Cards
Place cards can help organize your reception seating while adding a personal detail to every table setting. You can make them from cardstock, kraft paper, wood, leaves, or small tags.
For a simple design, cut cardstock into rectangles and fold each piece in half. Add a small greenery sprig or ribbon.
Wooden tags work well for rustic weddings. Pressed leaves or dried flowers can create a garden-inspired appearance.
Use a consistent shape for every guest so the table remains neat.
Prepare the cards well before the wedding. Arrange them alphabetically or by table number to make setup easier.
Ask a friend to double-check names before everything is packed.
If handwriting is difficult, print the names at home using a simple template. Test the paper first to avoid wasting supplies.
You can also turn place cards into favors by attaching them to small candles, plants, cookies, or chocolates.
Keep the design small enough to fit comfortably on each plate.
Handmade place cards can add a thoughtful personal detail to an otherwise simple table setting.
Create DIY Ceremony Programs
Ceremony programs can be simple and practical. You can design them at home using a basic document editor and print them on affordable cardstock.
Choose a clean layout with enough space for the ceremony details. Add a small decorative element such as a botanical illustration, border, or ribbon.
Fold each sheet into a booklet if you want a more traditional appearance. For a minimalist wedding, use a single card.
Print a small batch first and check the paper quality. This prevents problems when producing the full set.
If your guest list is large, consider making one program per couple or household rather than one for every individual.
You can also create fan-style programs for an outdoor summer ceremony. Attach the paper to a wooden craft stick.
Ask friends to help fold, cut, or assemble the programs.
Keep the finished programs in boxes so they remain clean and flat before the ceremony.
Use leftover cardstock for menu cards, favor tags, or small signage.
A DIY program can provide useful ceremony information while keeping stationery costs under control.
Craft Handmade Napkin Rings
Napkin rings are a small detail that can make reception tables feel more decorated. They are also easy to make in batches.
Use twine, ribbon, wooden beads, paper rings, wire, or thin strips of fabric. Wrap the material around a napkin and secure it with a simple knot or loop.
Add one small greenery sprig or dried flower to each ring. Eucalyptus and baby’s breath are especially easy to use.
For a modern table, try a plain linen strip with a small wooden accent. For a rustic celebration, natural twine can work beautifully.
Create one sample first and test it around your chosen napkins.
Cut all materials at once to keep the sizes consistent. Store completed napkin rings in a box until the wedding.
Ask members of the wedding party to help assemble them during a craft afternoon.
You can also reuse the materials after the event for gift wrapping or future celebrations.
This project requires very few supplies but can add a polished handmade detail to every place setting.
Style a DIY Dessert Table
A dessert table can become one of the most inviting parts of your reception. You can style it yourself using stands, trays, jars, flowers, and simple fabric.
Start with a tablecloth or runner that matches your wedding palette. Add cake stands at different heights to create levels.
Use plates and trays you already own or borrow from family members. Thrift shops can also provide inexpensive serving pieces.
Fill glass jars with cookies, candies, marshmallows, or other treats. Choose desserts that are easy to serve and can sit safely during the event.
Add a small floral arrangement or greenery between dessert pieces. Keep decorations away from food surfaces.
Place heavier items toward the back and smaller treats near the front.
Ask a friend to handle replenishing the table during the reception so you can enjoy your celebration.
If you have a wedding cake, make it the visual centerpiece and arrange smaller desserts around it.
A thoughtful layout can make simple homemade desserts look inviting and celebration-ready.
Make Decorative Wedding Lanterns
DIY lanterns can add warmth to an evening wedding. Glass jars are an easy starting point.
Place battery-operated candles inside the jars for a safe option. Wrap the outside with twine, lace, ribbon, or thin wire.
You can also add small greenery around the base. Keep natural materials away from open flames.
Arrange lanterns along walkways, around the reception entrance, near the dessert table, or beside lounge seating.
Use jars of different sizes for a relaxed arrangement. Matching jars create a cleaner modern appearance.
Check venue rules before placing decorations outdoors. Some locations restrict candles or hanging items.
Prepare lanterns several days ahead and pack them carefully for transport.
Ask friends to place the lanterns during setup according to a simple layout photograph.
After the wedding, the jars can be reused as home décor, storage containers, or planters.
This is a low-cost project that can add soft evening atmosphere without expensive lighting rentals.
Build a DIY Seating Chart
A seating chart can be both practical and decorative. You can create one using a wooden board, frame, pegboard, wire grid, or collection of small cards.
For a simple setup, arrange table cards in rows on a large board. Attach them with clips, ribbon, or small decorative pins.
Add greenery around the edges rather than filling the entire board.
If you want something more flexible, place individual cards into small envelopes or holders. This makes rearranging guests easier during the planning stage.
Use cardstock that matches your invitations and menus for a coordinated appearance.
Thrifted frames can make excellent seating chart borders. Paint one to match your wedding colors.
Prepare the chart in advance and double-check every guest name and table assignment.
Ask someone else to proofread it before printing or writing the final cards.
Place the display near the reception entrance where guests can find it without blocking traffic.
A DIY seating chart can combine useful guest information with attractive wedding décor.
Create a DIY Drink Station
A self-serve drink station can add convenience while giving you another opportunity for handmade décor. Use glass dispensers, pitchers, jars, trays, and simple serving containers.
Choose two or three drinks that suit your wedding season. Lemon water, iced tea, fruit punch, flavored sparkling water, or homemade lemonade can work well.
Add sliced citrus, berries, cucumber, mint, or herbs for visual appeal.
Place glasses on a tray beside the drink containers. Keep napkins and ice within easy reach.
Decorate the station with greenery, flowers, and a simple fabric runner.
Borrow dispensers and serving pieces from family members instead of purchasing everything.
Keep extra drinks chilled in a nearby cooler or refrigerator. Ask someone to monitor the station during the reception.
For outdoor weddings, place drinks in a shaded location and follow safe food and beverage handling practices.
This setup can help guests serve themselves while creating a welcoming reception feature with affordable supplies.
Assemble Handmade Treat Bags
Treat bags are a simple DIY favor that can be prepared ahead. Choose kraft paper bags, muslin pouches, small boxes, or clear food-safe bags.
Fill them with cookies, candies, popcorn, chocolate, tea, or another simple snack.
Tie each package with ribbon or twine. Add a small dried flower or greenery sprig for decoration.
If you are baking the treats yourself, choose recipes that hold their texture well. Test the recipe several days ahead.
Buy packaging in bulk and compare sizes before placing a large order. You want enough room for the treats without using oversized bags.
Prepare the bags in an assembly line. Set out the packaging, filling, ribbon, and decorations in separate groups.
Ask family members to help with filling and tying.
Store finished favors in airtight containers when food safety requires it.
Place the bags near the exit so guests can grab one as they leave.
A small handmade treat can give guests a sweet takeaway without a large favor budget.
Mix Thrifted Décor Pieces
Thrifted décor can help create a wedding reception with character while keeping costs manageable. Look for vases, candle holders, frames, trays, baskets, mirrors, and decorative boxes.
You do not have to find identical pieces. A collection of related shapes can create an appealing tablescape.
To make mismatched items feel coordinated, repeat one or two details. For example, use the same flower color across every arrangement.
You can also paint different pieces in one shade. Test paint on a small area first to check how it looks on each material.
Visit thrift stores, flea markets, garage sales, and local resale groups several weeks before the wedding.
Clean every item carefully before using it.
Create a mock table at home so you can see how everything works together. Take photographs and use them as setup guides.
After the wedding, resell pieces you no longer want or keep favorites for future celebrations.
This approach can create beautiful wedding décor from affordable secondhand finds while giving your reception a personal appearance.
Hang a Handmade Paper Flower Backdrop
Paper flowers can create a decorative backdrop without the cost of a large floral installation. Choose cardstock in two or three shades that match your wedding palette.
Make flowers in several sizes so the display has visual variety. You can find simple folding and cutting techniques that require only scissors, glue, and paper.
Attach the flowers to ribbon, fishing line, or a lightweight backing board. Add greenery made from paper or fabric if desired.
Hang the backdrop behind the sweetheart table, cake table, gift table, or photo area.
Prepare the flowers weeks before the wedding if your schedule allows. Store them in shallow boxes so they do not become crushed.
Invite friends to help with the cutting and assembly. This can turn a repetitive craft into a fun group activity.
Keep the backdrop lightweight and confirm that your venue permits hanging decorations.
After the wedding, save undamaged flowers for future parties or home décor.
A paper flower backdrop can create a large visual feature using inexpensive craft supplies.
Create a Cozy DIY Lounge Area
A small lounge area can give guests a comfortable place to relax between dancing, dinner, and conversation. You can build one using items borrowed from home.
Use floor cushions, outdoor pillows, blankets, woven baskets, rugs, and low tables. Choose fabrics that match the wedding palette.
Arrange seating in a loose circle so guests can talk comfortably.
Add candles, lanterns, or small floral arrangements for decoration. Outdoor lighting can make the area especially inviting after sunset.
If you do not own enough cushions, ask family members or friends to lend some. Cover mismatched pieces with neutral throws to create a more coordinated appearance.
Use washable fabrics and protect cushions from damp ground.
Keep the lounge away from food service areas and busy walkways.
Ask someone to check the area during the reception and move items if weather changes.
After the event, return borrowed pieces promptly.
This DIY setup can give guests an inviting place to rest without requiring expensive lounge furniture rentals.
Make Floating Candle Centerpieces
Floating candles can create an elegant centerpiece with very little material. Use clear glass bowls, cylinders, or shallow containers filled with clean water.
Add floating candles and a few flower petals or small greenery pieces.
Keep the design simple. Too many flowers can make the water look crowded.
Place the containers on a tray or wooden base to protect the table surface.
Use battery-operated floating candles if your venue restricts open flames.
Test the containers before the wedding. Check that they remain stable and do not leak.
You can find suitable glass containers at discount stores, thrift shops, or craft stores.
Prepare the containers shortly before the reception so the water remains clean.
Ask someone to light or activate the candles during setup if necessary.
After the event, empty and clean the containers for future use.
This project works particularly well for romantic evening weddings, garden receptions, and minimalist tablescapes.
Decorate a Wedding Card Box
A wedding card box can be made from a wooden crate, sturdy gift box, suitcase, basket, or decorative container. Choose something with enough room for cards from your guest list.
Cover a plain box with fabric or paper if you want a cleaner appearance. Add ribbon, greenery, dried flowers, or a small decorative clasp.
For a vintage wedding, a secondhand suitcase can create a charming card holder. A wooden crate can work well for a rustic celebration.
Make sure the container has a secure opening and can be monitored during the reception.
Avoid adding loose decorations that could easily fall off.
Prepare the box several days ahead and test it with sample envelopes.
Place it on a stable table near the reception entrance or gift area.
Ask a trusted family member to keep an eye on cards during the event if appropriate.
After the wedding, the box can become a keepsake container for photographs, invitations, and other memories.
A DIY card box can serve a practical purpose while fitting naturally into your wedding décor.
Conclusion
DIY wedding projects can help you create a celebration that feels personal without putting every decorative detail on a large budget. Start with a few projects that fit your theme and schedule. Handmade centerpieces, signs, favors, table décor, backdrops, and guest stations can all add character with simple supplies. Choose projects that you can comfortably finish before the wedding, and ask friends or family to share the workload. You do not have to make everything yourself. Even two or three handmade details can give your ceremony and reception a personal touch that guests remember.